Statement of Intent
For this project of places and spaces I intend to explore in great depth a more modern and spontaneous styles of architectural and landscape photography. I also intend explore a wide range of modern architectural photographers in great detail, such as Tom Wayne and Stephanie Jung. I chose these photographers to research for this project as I really like that both of their pieces work really juxtapose with each others really well. For further photoshoots I intend to replicate Tom Wayne's momentous and contemporary along with Stephanie Jung's more formatted and structured style. However, I feel as if Tom Wayne's style will be easier replicate into my own work whereas Stephanie Jung's style will require more thought and deeper meaning behind the composition and the photograph in general. I think this because Jung's style is more studio esque which will be much more difficult replicate in the project of architecture. Our first trip as a class for this project will be in Salford quays. The trip will start with us taking many photographs of and in front of the imperial war museum, for this part of the photoshoot I intend to implement the styles of Thom Wayne as the war museum has a very brutalist yet has a modern look to it so I intend to utilise my inspiration of the way Thom Wayne composes his architecture photographs. After we have taken pictures of the imperial war museum we will then go over to one of the bridges going over the cannel, I have been that part of Salford quays before and I feel as if it has nearly the perfect kind of modern day architecture so that I am able to use my inspiration of Stephanie Jung's work and implement it into my own.
Once we have come back from the trip I intend to use the inspiration of Stephanie Jung to further create a very intricate and abstract edit for a Final piece. When we are back from the trip I also intend to use the compositional techniques I learnt from using inspiration from Thom Wayne into future architecture photoshoots. My initial thoughts of this project were the straight forward idea that Architectural photographs were just images of buildings. However, as I delved deeper with my research I found that there are many different styles and ways of composing architectural photographs. This further research has enabled me to think more about the way I compose and try and put more thought into the way I take architectural photographs while still keeping them looking as spontaneous as possible. Throughout this project I intend to explore a range of landscape photographers such as, the innovative, unrehearsed or spontaneous style of Ansel Adams,
I intend to explore the the more in nature spontaneous style of Ansel Adams and through different methods of research. Further on in the project I intend to implement the inspiration I gain from researching Adams into further photoshoots.
Further on into this project I intend to broaden my skills on photoshop as I feel that places and spaces will introduce a whole new range of different edits to be completed and improve the more photoshoots I do. Towards the end of this project I intend to complete a very detailed and thorough project evaluation presenting my feelings on the project and where started to the progression that I will have made by the end of this project.
Places and spaces initial mind map

Simon Buckley Mood board

Simon Buckley Analysis
Simon Buckley Analysis - 'Walk The Plank'
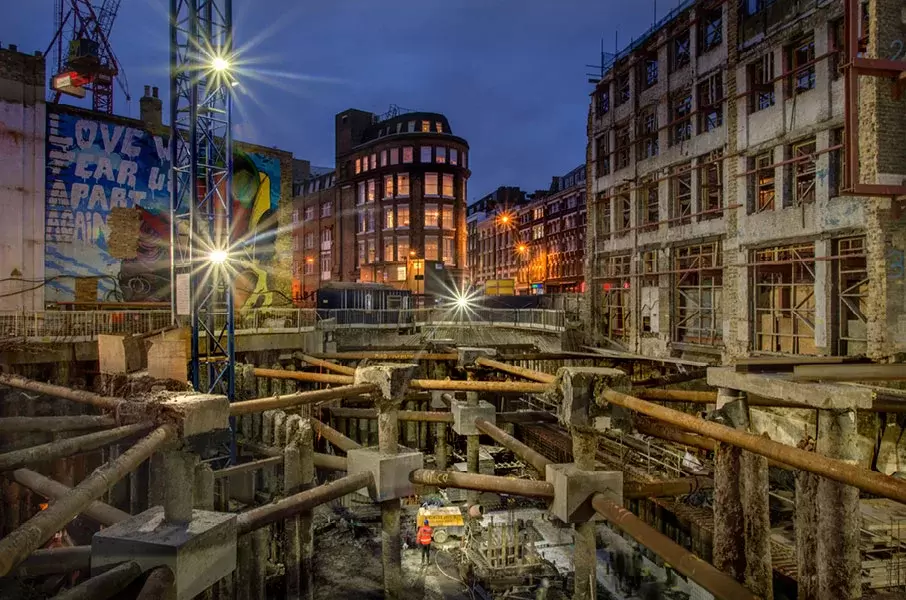
Simon Buckley is a well known Salford based photographer whose work is aimed at capturing “the frequent transition within the urban environment”. Simon's interest in modern architecture caused him to create the “not quite light” project, which presents the themes of “ heritage and regeneration at dawn and dusk“. Due to his new work becoming more publicised it is also allowing the creation of a new era of architecture photography. From what I have analysed I can see that this image wasn’t taken on any of his tours/trips to another country as there is mural in the background which says “love will tear us apart” this line is from a famous band from Manchester called Joy Division. However the larger more modern looking building in the background is The Great Eastern hotel which is in London.
In this landscape image of this flourishing society, Simon has used the construction of this building to emphasise how far society has come and how much we can complete if we put our minds to it. The title “walk the plank” I feel, really highlights the central meaning and focus for this image as it could be suggesting that if we take risks and go that extra distance in life we can do such significantly greater things. In this realistic landscape/architecture image it appears one of the construction workers at the bottom of the image has been highlighted, almost framed. This might be because he wants to show his appreciation for the people who work long hard hours for construction sites. The overall message that Simon Buckley was trying depict through this photograph was to spread awareness of the hardship that these industrial workers go in vile, dusty working conditions just to get by day by day. In this landscape image the edge of the photograph seems to have been slightly distorted. This could have been because Buckley perhaps, wanted the viewers of the photograph to immediately focus their attention to more around the center of the image. Initially, my first thoughts of seeing the title 'walk the plank' were how that would that link to the actual image it's self. However, as I delved deeper with my research and thinking about what it could infer form the exaggerated sections of the photographs all the way to the joy division mural.
Texture in photography is the roughness or how smooth a specific part of the image is. In this innovative and originative architectural image texture is presented using the many metal poles that look to be the underneath structure of a building. The structure of the building accentuates the very far depth of field, then allowing the viewers of the image to see what Buckley wanted to highlight.
The compositional rule used in this image which really stands out to me is the strong leading lines. This is presented through the angle of the photograph creating a natural line of direction for the viewers eyes to lead to. We use leading lines to direct the viewers attention to a point of focus or interest. The two buildings surrounding the hotel in the image create almost this natural frame causing the audience of the image’s eyes to be drawn towards what could also be deemed as the central focal point as well as the construction site in the bottom center of the image. In this image it could also be argued that Simon Buckley has also used the construction site to emphasise the foreground. The use of different camera settings used in this photograph that really helped impact the sharpness of the image was the ISO being at 400 or 800 since the natural lighting of the image was already dark I think he kept it at a high setting to allow the image to become more clear and not to noisy letting in more light. In this photograph the F/stop being used will have been at around F/2.8 or F/2.0. This will have allowed the image to have a larger aperture causing the image to let more light in rather than out. As this photograph is a still image the shutter speed will have been at a fast shutter around 1/125 to 1/250 and if there was something moving in the image the setting being relatively fast will have allowed the photograph to still be clear, crisp and in focus. In my opinion I think the part of the photograph that has been edited is the beams of light made to look like they are naturally bouncing of the camera lens to allow the viewer to think the light has naturally formed almost a floral shape.
In my opinion I really like this piece of work by Simon Buckley as it being an aesthetically pleasing image to look at with strong use of compositional rules it also shows its deeper meaning in quite a subtle way. The use of the construction site and the architecture around the site acting as a frame I feel also really stands out to me because the project I'm mainly focusing on at the moment is framing. This kind of photograph will give me really good inspiration and ideas to go off of in future photoshoots as its simple and I could mix this way of framing with other styles. As Simon Buckley is from Manchester and a lot of his work was taken and captured in Manchester, this really highlights that in future photoshoots his images allow me to be able to gather lots of influence and inspiration for ideas during different architecture shoots. If I were to carry out this photoshoot one compositional skill I would need to focus on is definitely symmetry as the role of this is to ensure that photographs are consistent, balanced and visually pleasing. I feel like this would be a useful tool to have in future photoshoots as it can open up a new style and awakening of architecture photography as its not so commonly used in this context.
Ansel Adams - Analysis
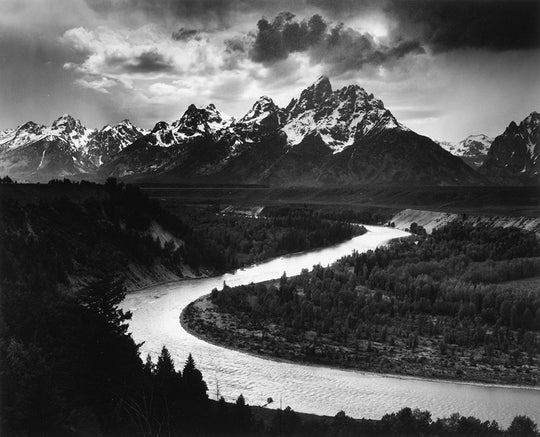
Ansel Adams - 'The snake river'
Ansel Adams, born in western San Francisco on the 20th February 1902 and died 22nd of April 1984. Ansel Adams was an American landscape photographer and environmentalist well known for his black and white/desaturated photographs of the lush forests and monumental mountain ranges of western North America. Ansel's Captivating and fascinating landscape photography has further inspired/sparked the new era of what is landscape photography today. This photograph by Ansel Adams was originally taken in 1942 for a part of the 'mural project' created by the US department of the interior. This project was initially created as a part of a celebration for the US national park system. Ansel first gained his pride for photography when he first visited the 'ocean of mountains' in Montana at the age of 14, and at the age of 15 where he gained work at the US forest service in the Bitterroot national forest. The snake river by Ansel Adams was later displayed on the walls of the US department of interior building where it gained its first grasp of popularity.
I cant Find much about the factual reasoning and feeling behind this photograph, however, I can infer that this image might have been taken to represent Ansel's love and devotion to the environment. Furthermore, this photograph could have been taken to depict the loneliness and overwhelming power and force of nature. This black and white landscape photograph by Ansel Adams was named 'the snake river' due to the multiple bends in the river almost swaying side to side like a snake moving towards the mountain. This photograph is a realistic image as the large group of clouds above the mountain seems to have been intentionally emphasized depicting the true beauty of nature, and how it has the snake like river slowly slithering towards the mountain. The use of the black and white contrast between the forest, river and the mountain allows the viewer to understand the possible negative depiction of him showing that nature is his stress free, mental escape from reality. The dark, gloomy tone of the image could have been used to also represent how Ansel was feeling deep down at the time of taking the image. Ansel Adams has a common theme throughout this project of landscape photographs that all seem to have a very dark and murky felling to them. The use of the title 'The Snake river' could have also been mainly focused on the word 'snake' which is often used to describe a person that misleads and betrays people, this might have also been a depiction of his emotions that he was trying to portray through this image. This landscape image by Adams contains lots of levels of texture. Texture in photography is the roughness or how smooth the surface of the image is. The use of texture in this image is presented using the rough and harsh looking conditions of the mountains. Shapes in photography is when the photograph contains a two or three dimensional subject matter. The use of shapes in this image is the strong leading lines of the mirror then leading all the way up to the middle ground which is the mountain.
There are many compositional rules in this image that accentuate the purity and almost refreshing sensation that this photograph could convey to some viewers. A few examples of the compositional rules that are used in this image are, Strong leading lines, asymmetry, a bit of triangles and a far depth of field. The use of strong leading lines in this image have been used to accentuate the strong possible meaning behind the photograph and to draw the attention of the viewers eyes to slowly drift up the image towards the subject matter which in this case is the mountain. photographers use strong leading lines to accentuate the meaning, overall quality of the image and to draw the attention of the viewers to the subject matter of the photograph whether that is a model or an inanimate object/thing. This photograph was framed at a sturdy asymmetrical angle to present that the clouds could be used as a blanket covering imperfections of nature and to highlight the snake river itself. Asymmetry can be used to give a more realistic feel to photographs as not everything is perfect in life and gives the image more dynamism. The use of triangles in this image is used to accentuate the colossal subject matter. Triangles in photography can be used to help balance out the rule of thirds and can lead the viewers eyes from one corner of the frame to another. The far depth of field being used in this image created by the F/stop being at around F/5.6 - F/8 causing the image to be slightly darker, has really allowed it to become the innovative photograph it is today. There are many camera settings used and changed in this image that have really accentuated the the use of strong leading lines and asymmetry. A few examples of the camera setting's used in this image that highlight the strong leading lines are, The use of the ISO being at around 200 - 400 ensuring that the camera lets in enough light to allow the photograph to become a more clear crisp image. Another example of a camera setting that really gives emphasis to the strong leading lines is, the white balance being either set to daylight or cloudy. Setting the white balance to daylight allows the image to brighten, contrasting the mountain with the snake like river smoothly. Setting the white balance to cloudy allows the image to become brighter making the clouds in the image much more clear and sharp. The shutter speed in this image could have perhaps been at around 1/1000 - 1/500, allowing for the precise capture of the moving river and the swaying trees.
The foreground in this image being the silhouette of the trees and the snake like river immediately outlines how the title of this photograph correlates with the content of the image. The middle ground of this photograph being the, mountain and the trees leading up the side of the mountain really accentuates how the leading lines of the river direct the viewers attention up the photograph. The background of this image being the daunting, cloudy sky causes the brighter part of the clouds to almost look un - earthly.
I really like this photograph because of the powerful and possible emotive imagery this image creates in your head. There are many strengths that could be highlighted in this image. For example, the use of the berm bouncing the viewers eyes over to nearer the front of the river (the leading lines). On the other hand a weakness within this image that some of the closer up parts and around the edges of the image have become distorted. There are many possible reasons for this for example, the age of the camera, the F/stop effecting how far the depth of field is and the exposure perhaps becoming slightly under exposed. In the future I plan to implement the inspiration I gained from this analysis and the research I did behind the photograph into future photoshoots I that I will carry out later in this project. During this photoshoot I will need to focus on using a range of different camera settings in the fashion and style that Ansel Adams did to create his inspiring and unique images. During the photoshoot I will ensure that my F/stop is set to around F/2.8 - F/4.0, as I am taking My landscape images in a most likely cloudy setting the F/stop being at that setting, will allow enough light to get into the image to the point were it becomes perfectly exposed (not to bright, not to dark) . Another example of a camera setting that is important to implement into my photoshoot is the ISO, being at either 400 - 800. This will allow the image to be bright enough to the point where it becomes a more clear and crisp photograph.
Candida Hofer Analysis

Candida Hofer was born in Eberswalde Germany 1944. Candida Hofer is a well renowned architectural interior photographer, best recognised for her cleverly composed, colourful and visionary photographs of the insides of theatres, cathedral halls and art gallery's. During Hofer's early spark for photography she attended and graduated from the academy of fine and applied arts in Germany. Hofer's first taste of recognition was through her portrait photography in different newspapers she was producing for. Later on in her photography career she started to pursue a more architectural and intricate style of photography, visiting places and attractions all around the world such as, theatres in China, cathedrals and museums all around Europe. This specific photograph By Hofer was taken during her trip to Italy for the creation of photoshoots capturing the immensely grand design of the inside of the Olympic theatre in Vicenza, Northern Italy. Throughout this photoshoot she took a range of photographs similar to this each containing different angles of the theatre.
When researching this photograph I was not able to find much about the factual reasoning behind this photograph. However, I did gather that she took this type or style of photograph because she wanted to explore the physiological impact that neat presentation and the structured design of the buildings interiors have on people that visit them. She carried that out throughout the use of this image containing almost an abstract style, presented through the sculptures and statues of possibly influential people from the time that the theatre was originally built. The use of these statues/sculptures allows us as the viewers to perhaps imagine that they were created and placed in that specific order to accentuate the countless amount of time and effort that was put into the creation of them. The title of this work being straight forward and specific to the photograph (Teatro Olimpico Vicenza) does not give the impression that Hofer was trying to cleverly infer deeper meaning to the image through the title as well as the photograph itself. On the other hand the Image itself seems to have conceivably trying to present deeper meaning through the different levels of the theatre being shown and the way Hofer took the photograph (the sky ceiling to represent god, the higher statues to depict angels, the lower placed statues to represent humans and the rest of the lower layers representing animals/trees/rocks.) This could be a juxtaposition to the great chain of being, which is an ancient hierarchal structure of society, formed originally from medieval Christianity.
This photograph displays a strong use of texture. Texture in photography is the roughness or smoothness of a specific part of the photograph (Foreground, Middle ground, Background). The use of texture in this photograph is presented through the use of the sky and cloud painting on the ceiling appearing extremely smooth, again perhaps making reference to the juxtaposition of the different layers to the theatre.
There is a wide range of compositional rules used in this image such as, strong leading lines, asymmetry, the rule of thirds and a far depth of field. Strong leading lines is when the subject matter draws the viewers eyes and attention up the middle line of the photograph ( generally in the shape of a bend or a really long pathway) . The use of strong leading lines in this image is presented through the use of the more old fashioned looking seating curling around the foreground, middle ground, and background of the image to the far left hand side edge. The use of strong leading lines has also been used to accentuate the idea of depicting a deeper meaning using The Great Chain of being. Asymmetry is when an image contains an un balanced or un even subject matter. The use asymmetry in this image has been accentuated by Hofer taking or cropping the image so it seems as if it has purposefully been taken by holding the camera sideways for a more portrait style composition. Asymmetry in this image could have also been used to highlight the very top of the image which the sky painting on the ceiling which has an un balanced amount of clouds. The rule of thirds is when the photograph contains the majority of its subject matter on one hand side of the image ( left or right side.) The use of the rule of thirds in this image is presented using all of the statues on the far right hand side of the image. This allows the viewers attention to then immediately become grabbed from the right side of the image to around the middle using strong leading lines. A far depth of field in photography is the part of an image that is a long distance away from the camera and is still in focus. The use of a far depth of field in this image is presented using the camera setting F/stop. The F/stop in this image will have been set to around F/2.8 - F/4.0. This will have allowed the camera to let in enough light to the point where the photograph becomes perfectly exposed. Candida Hofer cleverly utilised a wide range of camera settings in this image to help improve its composition. This includes its ISO, white balance and shutter speed. The ISO camera setting controls the overall amount of light that can be let into the camera. The ISO in this image will have been set at around 400 - 800, this will have allowed enough artificial light into the image to the point where it becomes a clear and crisp image. The white balance this image will have been set at either 'flash' or 'auto'. Setting the white balance to flash allows the camera to create a more saturated tint on the photograph, then causing the colours of the ceiling for example to pop out even more. Setting the white balance to auto allows the camera to automatically choose a white balance setting by adjusting to the amount of light let into the image depending on if it is natural sunlight or studio light. Hofer will have set the shutter speed to either 1/1000 or 1/500 as it is a still image. This will have caused the image to become as sharp as possible because the lower the shutter speed the more out of focus the subject matter can become if its moving.
I really like this innovative, intricate and elaborate architectural photograph by Candida Hofer because she really holds the focus of getting her viewers to focus on the deeper meaning. In this photograph and throughout many other photoshoots she manages to create the atmospheric feeling of the places she's visited through the range of compositional rules she used. This image by Candida Hofer links to mine in a few ways such as, through use of colour and using a range of different compositional throughout each photoshoot but in different way compared to Hofer. During future photoshoots I will focus on implementing the compositional inspiration I gained from researching her as a photographer ( including the strong leading lines, the rule of thirds, asymmetry and a far depth of field ), the contextual research behind her photographs. When implementing the different types of inspiration I gained through researching and analysing Hofer, I will ensure that I take into account that she was taking a different type of architectural photographs that may not be completely achievable for me to carry out, so I will need to adapt the inspiration to suit me more.
Wayne Thom - Mood board
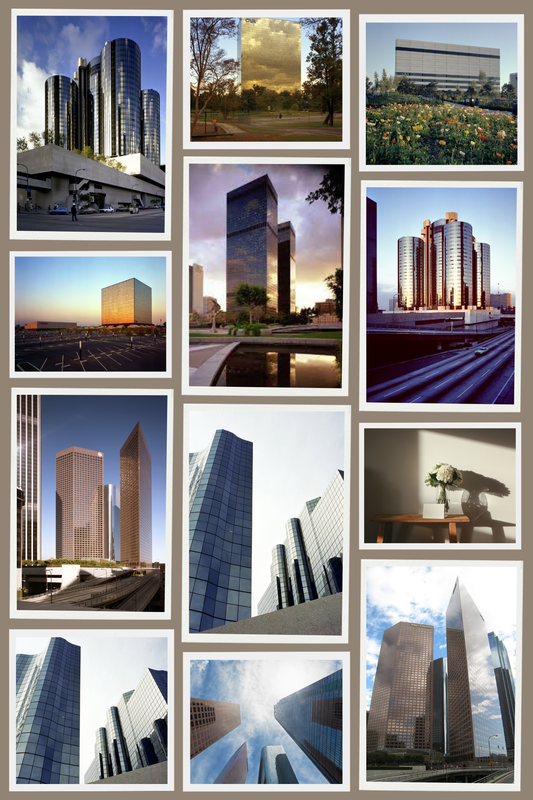
This mood board I created is based off Wayne Thom's images. Wayne Thom is architectural photographer who was born 13th December 1933 in Shanghai, China. during his career he has won a number of rewards such as the fellow American society of photographers award. Wayne Thom's career has lasted five decades and has documented around 2,800 projects. I have chosen Wayne Thom because I really like the style and similarity to my landscape images. Moving forward this year I hope to complete edits on photoshop similar to the style of his work. When I go to Salford quays to carry out a planned photoshoot I hope to implement the inspiration I gained from researching Wayne Thom as his more architectural style will fit and resemble well with the architecture/ cityscape of Salford quays.
Salford Quays Photoshoot
Imperial war museum


Bridge near Imperial War Museum


Outside of the blue peter gardens


Outside of the lowry


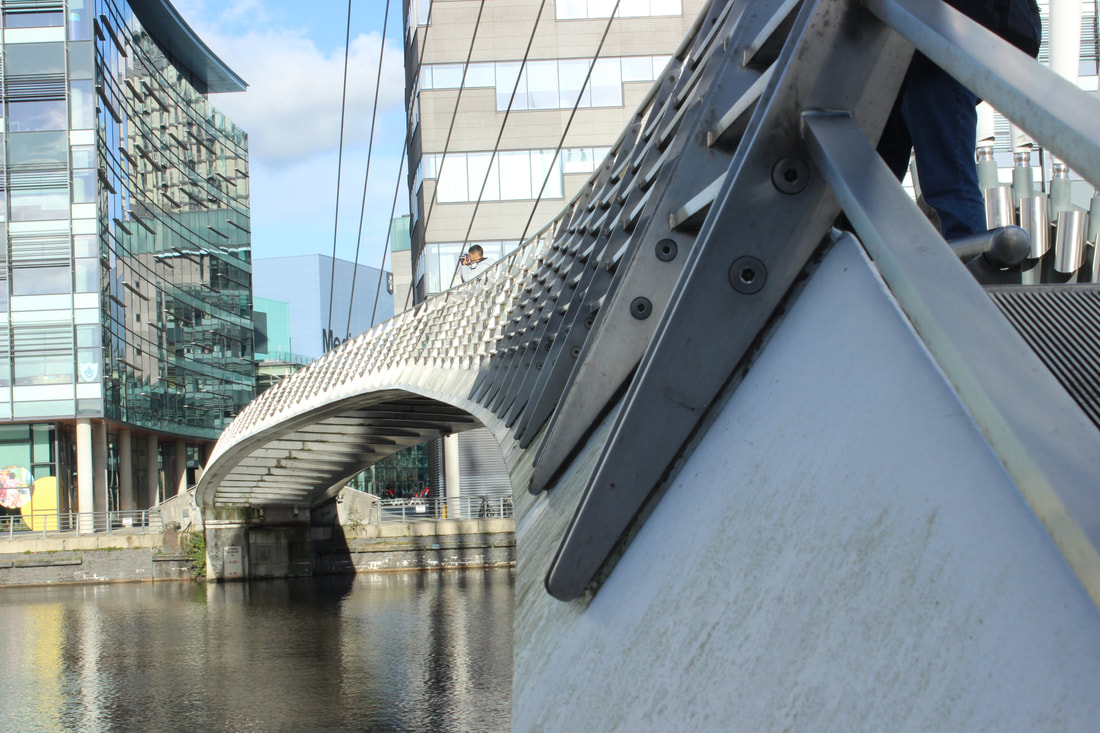
Bridge outside of the lowry


Kaleidoscope Edit Mood board
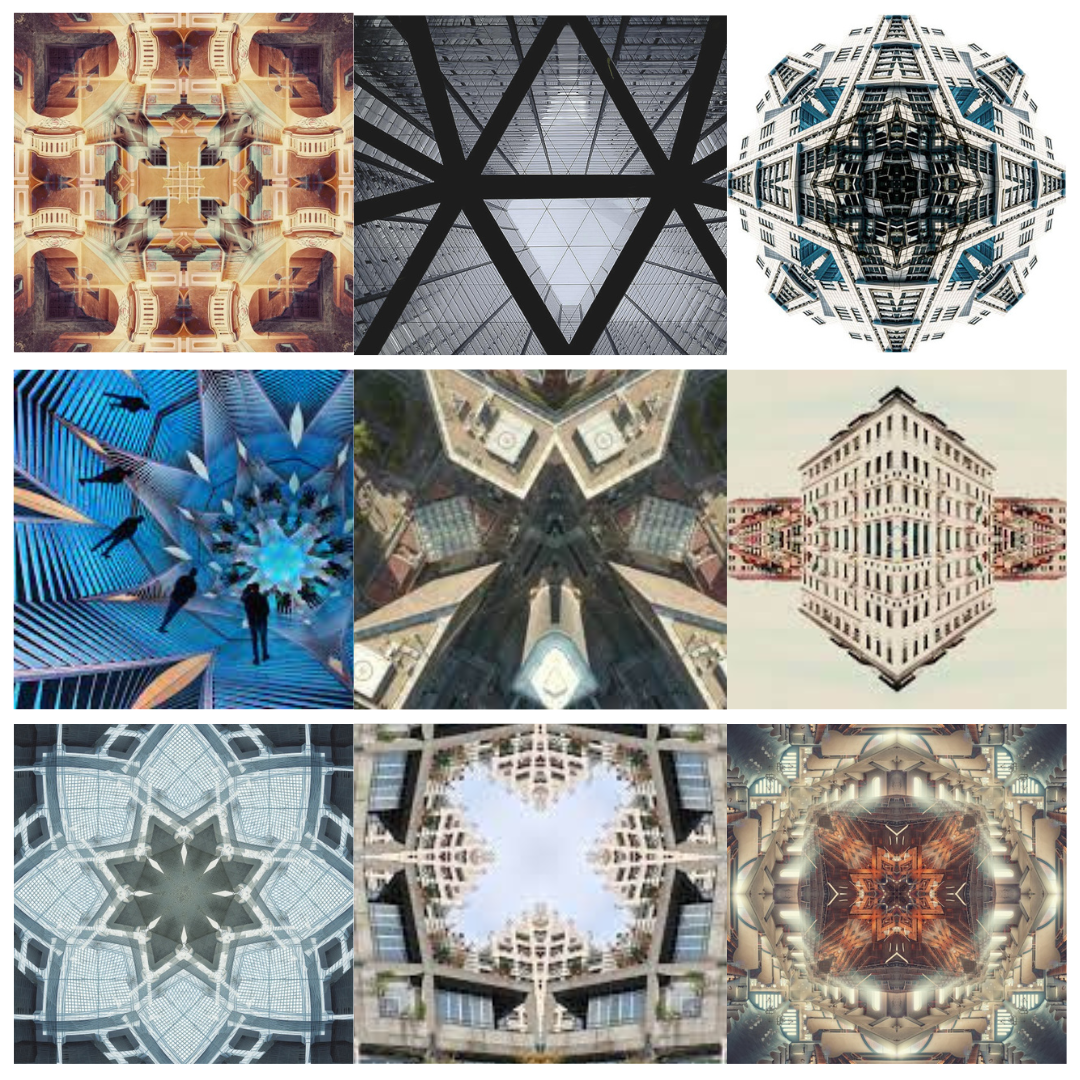
Kaleidoscope Edit
Before
|
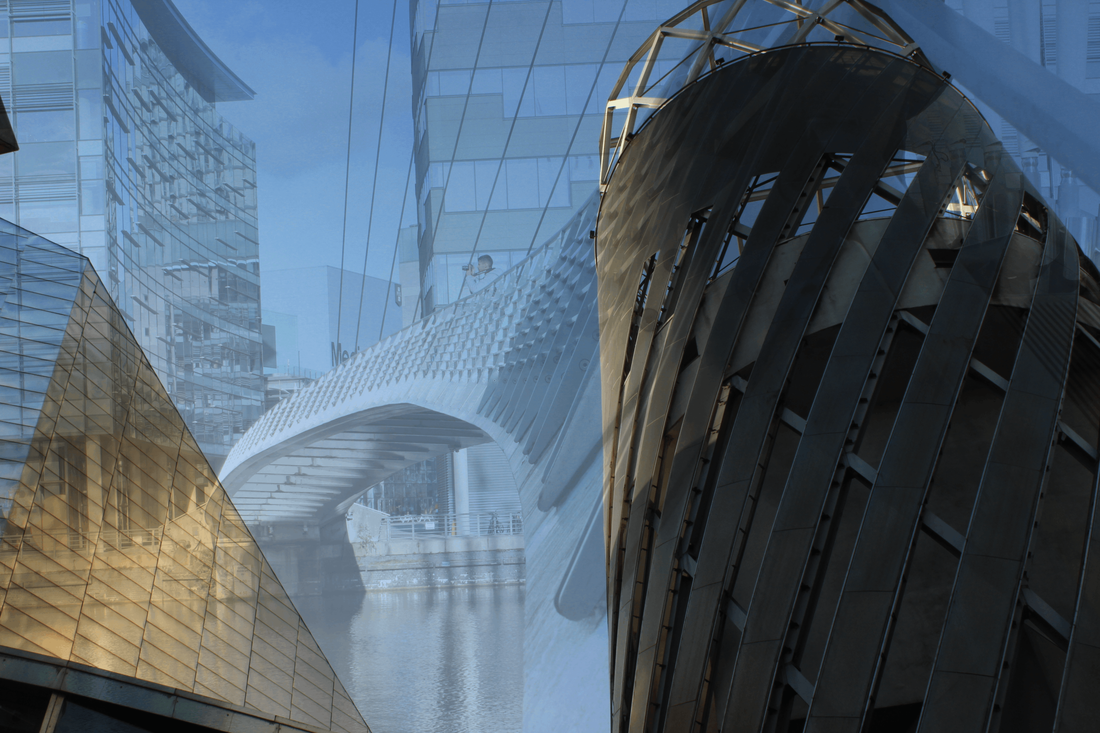
After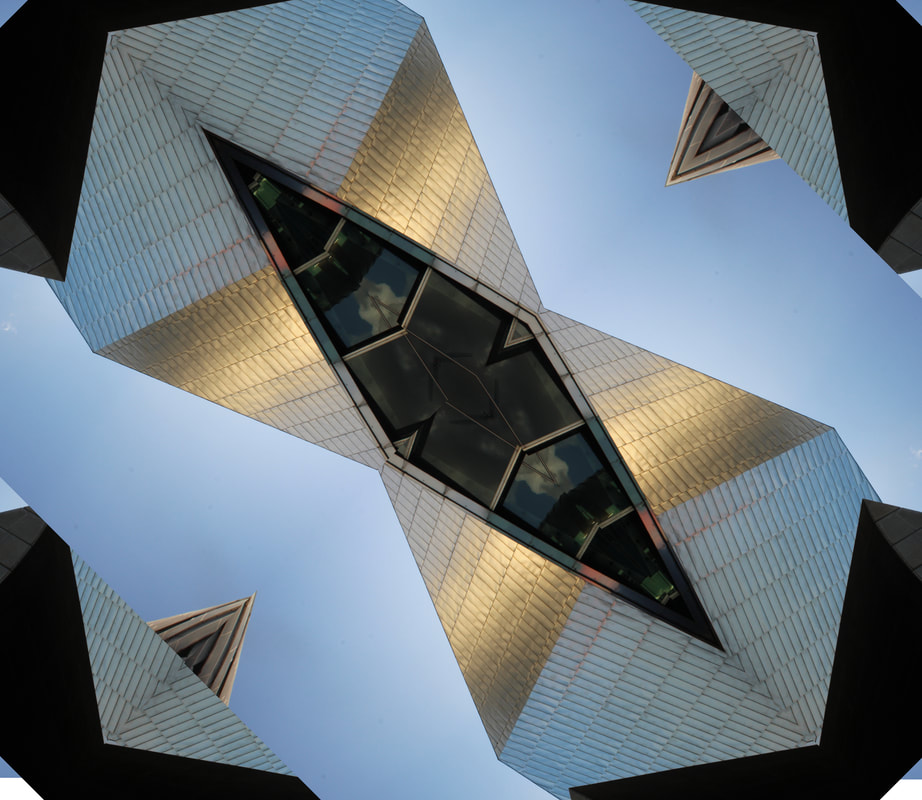
|
Edit Snips


Edit Tutorial Video
https://youtu.be/1mIsBN9Pv1M
Architecture Homework Images
Toast rack building


Modern Building


Graffiti Wall


Church


mobile photography
Tatton park


Beach hut's


Beach hut double exposure edit
Before |
After |

|

|
Edit snips


The same place over a week


Stephanie Jung mood board

Stephanie Jung is a freelance photographer based in Germany. When she finished her visual communications studies in 2010, was when she found her love and passion for photography and ever since then she has been working as a freelance photographer. Her projects at the moment are focused on fine art and portrait photography.
Layering Images Homework
Before |
After |

|

|
Edit images


Layering images 2
Before |
After |
|
|

|
Edit images


Layering images 3
Before |
After |
|
|
Edit images


Mock Exam Edits
Duplicating layers Edit 1

|

|
Before |
After |
Edit snips


Duplicating Layers Edit 2

Before |

After |
Edit snips


duplicating layers Edit 3
|
|
|
Before |
After |
Edit snips


Places and spaces Tatton park photoshoot - plan
Plan for Shoots
Name:
Joseph Corlett
Project Title/ shoot number:
Places and spaces photo shoot 1
Description of aims for shoot:
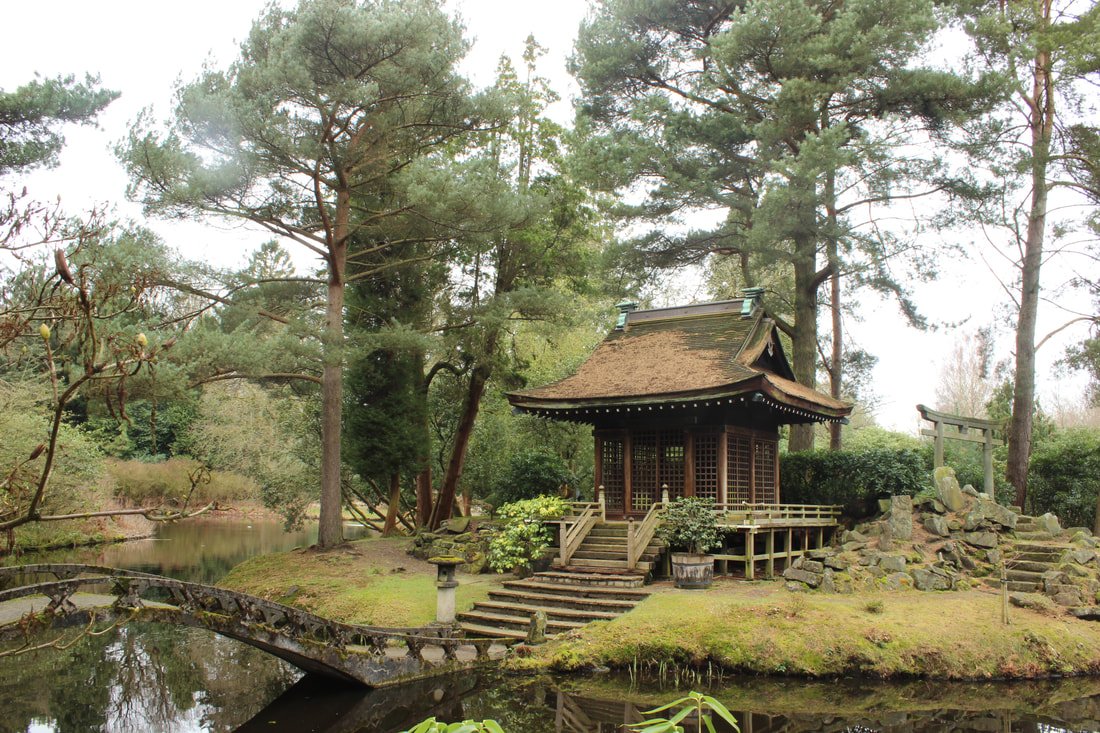
My overall aim for this photo shoot is to take innovative, well composed, clear and crisp final outcome photographs of the beautiful Japanese gardens in Tatton park, along with the other different gardens in the park.
Links with Photographers
Throughout the duration of this photoshoot I intend to implement my inspiration that I gained from researching photographers that use the styles of architecture and landscape. Examples of photographers that I gained inspiration from are, Ansel Adams, Sebastien Weiss and Candida Hofer.
Location: Tatton park
Props/ items needed: During this photo shoot I will not need any props.
Kit needed e.g. lighting, tripod, backdrop, macro lens:
For this photo shoot the only kit I would potentially need to use is a tripod. This is because The photographs that I intend to take intentionally look spontaneous.
Camera settings I will use:
F-Stop :
For this photo shoot I will set my F/stop at around F/4.0 - F/5.6, this will allow the camera to let in enough light to the point where the photograph does not become too exposed or under exposed.
White Balance:
For this photo shoot I will set my white balance to auto or daylight. Setting the white balance to daylight will allow the camera to give the image a more saturated tint.
Shutter speed:
During this photo shoot I will set my shutter speed to 1/1000. This is because the images I will be taking are most likely going to still photograph's .
ISO:
During this photo shoot I will set my ISO to around 200-400. This will cause the camera to let in enough light to the point where it becomes a nice clear and crisp image.
Which compositional rules will I use?
Throughout the duration of this photo shoot I will capture a wide range of photographs using multiple different compositional rules. A few examples of the compositional rules that I will implement into these photographs are, Worms eye view, the rule of thirds, asymmetry, strong leading lines and central focal point.
During this photo shoot I will use the compositional rule of worms eye view. This will help accentuate an image that has strong leading lines because the worm's eye view can be best used when taking an image from a wider angle. The use of the rule of thirds will help create the photograph to become well balanced and more spontaneous looking. The use of strong leading lines in this image will cause the viewer of the photographs eyes to become drawn towards the distant well focused subject matter. Central focal point in this image will allow the viewer of this photographs eyes to immediately drawn be towards the subject matter with very little spacing around the edges of the photograph.
Name:
Joseph Corlett
Project Title/ shoot number:
Places and spaces photo shoot 1
Description of aims for shoot:
My overall aim for this photo shoot is to take innovative, well composed, clear and crisp final outcome photographs of the beautiful Japanese gardens in Tatton park, along with the other different gardens in the park.
Links with Photographers
Throughout the duration of this photoshoot I intend to implement my inspiration that I gained from researching photographers that use the styles of architecture and landscape. Examples of photographers that I gained inspiration from are, Ansel Adams, Sebastien Weiss and Candida Hofer.
Location: Tatton park
Props/ items needed: During this photo shoot I will not need any props.
Kit needed e.g. lighting, tripod, backdrop, macro lens:
For this photo shoot the only kit I would potentially need to use is a tripod. This is because The photographs that I intend to take intentionally look spontaneous.
Camera settings I will use:
F-Stop :
For this photo shoot I will set my F/stop at around F/4.0 - F/5.6, this will allow the camera to let in enough light to the point where the photograph does not become too exposed or under exposed.
White Balance:
For this photo shoot I will set my white balance to auto or daylight. Setting the white balance to daylight will allow the camera to give the image a more saturated tint.
Shutter speed:
During this photo shoot I will set my shutter speed to 1/1000. This is because the images I will be taking are most likely going to still photograph's .
ISO:
During this photo shoot I will set my ISO to around 200-400. This will cause the camera to let in enough light to the point where it becomes a nice clear and crisp image.
Which compositional rules will I use?
Throughout the duration of this photo shoot I will capture a wide range of photographs using multiple different compositional rules. A few examples of the compositional rules that I will implement into these photographs are, Worms eye view, the rule of thirds, asymmetry, strong leading lines and central focal point.
During this photo shoot I will use the compositional rule of worms eye view. This will help accentuate an image that has strong leading lines because the worm's eye view can be best used when taking an image from a wider angle. The use of the rule of thirds will help create the photograph to become well balanced and more spontaneous looking. The use of strong leading lines in this image will cause the viewer of the photographs eyes to become drawn towards the distant well focused subject matter. Central focal point in this image will allow the viewer of this photographs eyes to immediately drawn be towards the subject matter with very little spacing around the edges of the photograph.
Places and spaces - Tatton park photoshoot
Through garden archway


Garden archway different angle


Garden doorway


Garden doorway from another angle


Building by the archway


Garden through the archway


Bench in the garden


Building at the edge of the garden


Building from a closer angle


Best |
Worst |

|

|
|
This is my best image from this part of the photoshoot because it contains a strong use of the rule of thirds, a bit of asymmetry and central focal point. The use of the rule of thirds in this photograph with the tree contrasting with the brick really allows the colours of the building pop out even more. Central focal point in this image has allowed for a more solid and obvious subject matter, then directly focusing the camera to the centre of the image. There are a range of camera settings that have been utilised throughout the creation of this image such as, the ISO, F/stop, white balance and the shutter speed.
The ISO in this image will have been set to around 400 - 800. In this case it has allowed the camera to let in enough light to the point where the image becomes a clear and crisp image. The F/stop in this image will have been set at around F/4.0 - F/2.8. Setting the F/stop to either one of these settings has allowed the camera's lens to let in the correct amount of light to the point where the image becomes perfectly balanced (not to over exposed or under exposed). Setting the F/stop to F/4.0 will also allow the photograph to keep a closer or shorter depth of field. The white balance in this image will have been set to either 'daylight' or 'auto'. Setting the white balance to 'daylight' allows the image to become quite a lot more saturated and brighter overall. Setting the white balance to 'auto' allows the camera to focus on the amount of light let into the lens then automatically choose a white balance setting suited for the amount of light or type of lighting. The shutter speed in this image will have been set to around either 1/250 or 1/500 this because the subject matter is a static object and if it was set any lower it would end up too out focus because the shutter will have taken to long to close. If I were to go back and re take this image just to make it even better than it already is I would most likely set my White balance setting to cloudy or just auto allowing the grey clouds to become more in focus. |
This is my worst image from this part of the photoshoot because it is slightly out of focus, not very well composed compared to my best photograph and the more lower angle causing the use of central focal point to look too asymmetrical. There was a range of camera settings that were altered throughout the creation of this photograph. Including, the ISO, F/stop, White balance and shutter speed. The ISO in this image will have been set to around 400 - 800 resulting in the amount of light being let into the camera causing the photograph to become too noisy and grainy. The F/stop in this photograph was set to around F/2.0 - F/2.8. Setting the F/stop to F/2.0 - 2.8 has resulted in it becoming to over exposed. The white balance in this image will have been set to either 'auto' or 'cloudy'. Setting the white balance to 'cloudy' has causes the the photograph to have a more colder coloured tint, in this case the cloudy white balance setting resulted in the colours of the photograph becoming colder. The shutter speed in this image was set to around 1/500 - 1/125. Setting the shutter speed to a moderately high setting has caused the amount of light being light into the camera's lens at the time to affect the speed at which the camera's shutter opens and closes. In this image the speed at which the shutter opens and closes has effected the photograph to become slightly out of focus. If I were to go back and take this photograph again I would ensure that I take my time to think more about how I was composing the photograph, using central focal point, the rule of thirds which in this case would be the tree at the right hand side of the image. I would also ensure that my white balance was set to either 'auto' or 'daylight'. Setting my white balance setting to 'daylight' in this case I feel would really boost my photograph as the colour of the decaying yellow bricks are highlighted more in my best photograph (White balance was set to daylight).
|
Path towards Japanese gardens


Looking back at the path


First bridge in the Japanese garden


Second bridge in the Japanese garden


Bridge across the Japanese garden


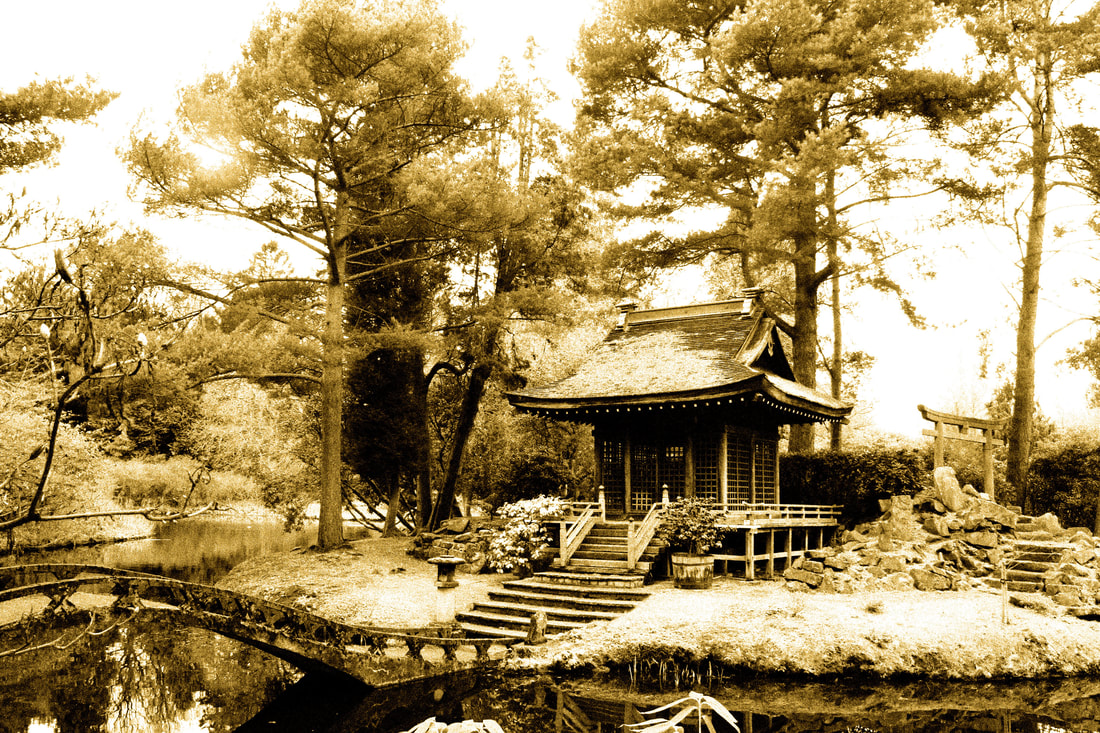
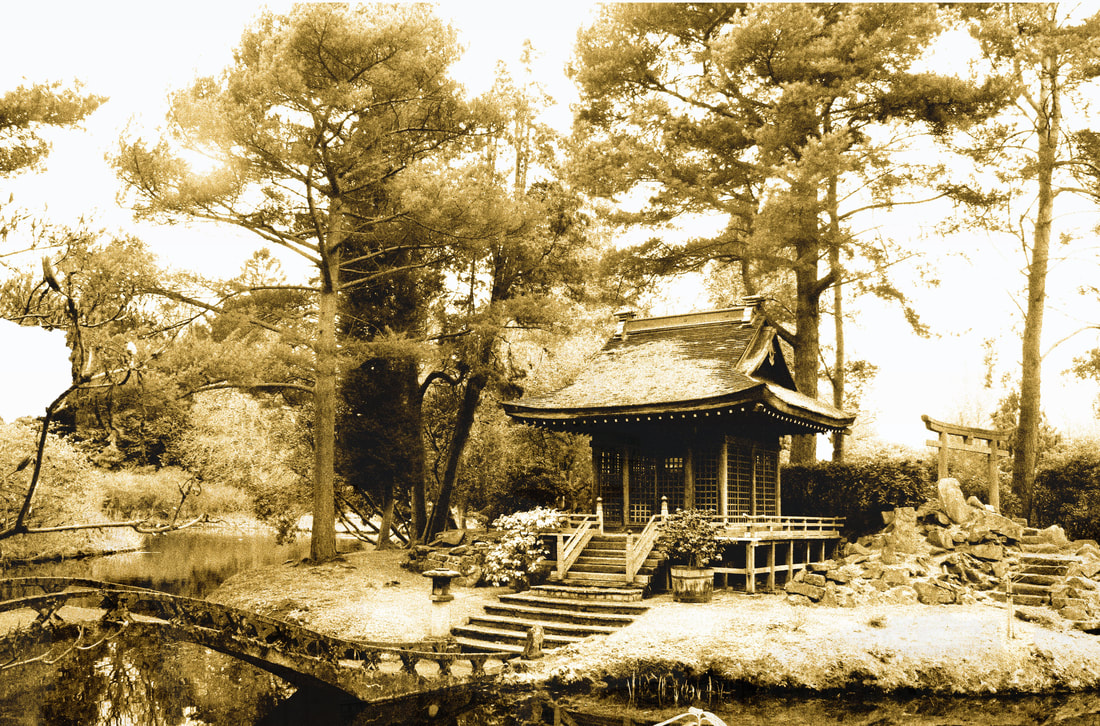
Japanese Hut


carved stone pillar


In the grounds of the Japanese garden


The grounds looking the opposite way


Main bridge going across


Different viewpoint of the Japanese hut

The hut from a lower angle

Japanese archway


Monument near the Japanese garden


View of the bridge from a distance


Side bridge to the Japanese gardens


Distant view of the Japanese gardens

Side doorway to the main house of Tatton park


Main house in Tatton park


The gardens of the main house


The view from the gardens


Places and spaces - Liverpool photoshoot plan
Project Title/ shoot number:
Places and spaces - Liverpool photoshoot 1
Name:
Joseph Corlett
Description of aims for shoot:
For this photoshoot I aim to implement a range of compositional rules and utilise many different camera settings into the innovative, precise photographs that I intend to capture.
Links with Photographers
Throughout this photoshoot I intend to implement the inspiration that I gained through researching a range of different photographers such as, the landscape style of Ansel Adams, the more architectural style of Sebastien weiss and the very intricate style of Candida Hofer.
Location:
Liverpool,
Props/ items needed: For this photoshoot I wont need really any props as I am taking my images of the raw architecture and landscape.
Kit needed e.g. lighting, tripod, backdrop, macro lens:
During this photoshoot the only main piece of kit that is a necessity for me to use is a tripod. This will allow me to take photographs of different subject matters with a lower shutter speed if necessary.
Camera settings I will use:
F-Stop :
For the duration of this photoshoot I will be taking my image throughout different times of the day. So therefore my F/stop will vary depending on where and when I take my photographs. At around midday my preferred F/stop setting will be on F/4.0 - F/2.8.
White Balance:
Throughout the duration of this photoshoot I will most likely leave my white balance on auto. This will allow the camera to automatically adjust to the amount of light shining into the lens, then automatically choosing an white balance setting on its own. However, if I was to take an image and the auto white balance setting did not adjust to the light very well I will most likely set it to daylight.
Shutter speed:
During this photoshoot I will set my shutter speed to a slow setting or fast setting depending on if the subject matter that I am trying to focus the photograph on has enough light surrounding it and the amount of light being let into the photograph.
ISO:
During this photoshoot I will set my ISO again depending on the amount of light being let into the camera. So therefore when there is a high amount light being let into the camera I will set the ISO to around 200 - 400.
Which compositional rules will I use?
Throughout the duration of this photoshoot I will implement a range of compositional rules such as, the rule of thirds, strong leading lines, asymmetry, central focal point and triangles.
During this photoshoot I will use the compositional rule of strong leading lines. Strong leading lines will allow the viewers of the photographs attention and eyes to be drawn all the way up the midline of the image to the subject matter. The use of the rule of thirds and asymmetry in this photoshoot will both contain a fairly similar purpose as they can cause the subject matter to become off to the side of the grid lines in the image.
Places and spaces - Liverpool photoshoot 1
Name:
Joseph Corlett
Description of aims for shoot:
For this photoshoot I aim to implement a range of compositional rules and utilise many different camera settings into the innovative, precise photographs that I intend to capture.
Links with Photographers
Throughout this photoshoot I intend to implement the inspiration that I gained through researching a range of different photographers such as, the landscape style of Ansel Adams, the more architectural style of Sebastien weiss and the very intricate style of Candida Hofer.
Location:
Liverpool,
- Docs
- City centre
- Bombed out church
Props/ items needed: For this photoshoot I wont need really any props as I am taking my images of the raw architecture and landscape.
Kit needed e.g. lighting, tripod, backdrop, macro lens:
During this photoshoot the only main piece of kit that is a necessity for me to use is a tripod. This will allow me to take photographs of different subject matters with a lower shutter speed if necessary.
Camera settings I will use:
F-Stop :
For the duration of this photoshoot I will be taking my image throughout different times of the day. So therefore my F/stop will vary depending on where and when I take my photographs. At around midday my preferred F/stop setting will be on F/4.0 - F/2.8.
White Balance:
Throughout the duration of this photoshoot I will most likely leave my white balance on auto. This will allow the camera to automatically adjust to the amount of light shining into the lens, then automatically choosing an white balance setting on its own. However, if I was to take an image and the auto white balance setting did not adjust to the light very well I will most likely set it to daylight.
Shutter speed:
During this photoshoot I will set my shutter speed to a slow setting or fast setting depending on if the subject matter that I am trying to focus the photograph on has enough light surrounding it and the amount of light being let into the photograph.
ISO:
During this photoshoot I will set my ISO again depending on the amount of light being let into the camera. So therefore when there is a high amount light being let into the camera I will set the ISO to around 200 - 400.
Which compositional rules will I use?
Throughout the duration of this photoshoot I will implement a range of compositional rules such as, the rule of thirds, strong leading lines, asymmetry, central focal point and triangles.
During this photoshoot I will use the compositional rule of strong leading lines. Strong leading lines will allow the viewers of the photographs attention and eyes to be drawn all the way up the midline of the image to the subject matter. The use of the rule of thirds and asymmetry in this photoshoot will both contain a fairly similar purpose as they can cause the subject matter to become off to the side of the grid lines in the image.
Places and spaces - Liverpool Photoshoot
The pumphouse restaurant


The pumphouse restaurant at a different angle


Liver building framed at a distance


Liver building from another angle


Modern building next to the Liver building


Liver across the docs


Liver on the docs from a different angle


Ferris wheel on the docs


Ferris wheel framed


Albert docs


Albert docs from another angle


Modern buildings framed


Albert docs through A life ring.


Albert docs walkway


Albert docs canal boats


Lamppost at Albert docs


Inside Albert Docs


Inside Albert docs zoomed in


Liver building framed by the docs


Across Albert docs


Albert docs front


Liver building from the pier head


The front of a sail boat


The three graces


The Port authority building at a low angle


Museum of Liverpool


Port authority building


Road in between the Port Authority


Building next to the Port authority


Down the main road next to the port authority building


Office near Albert Docs


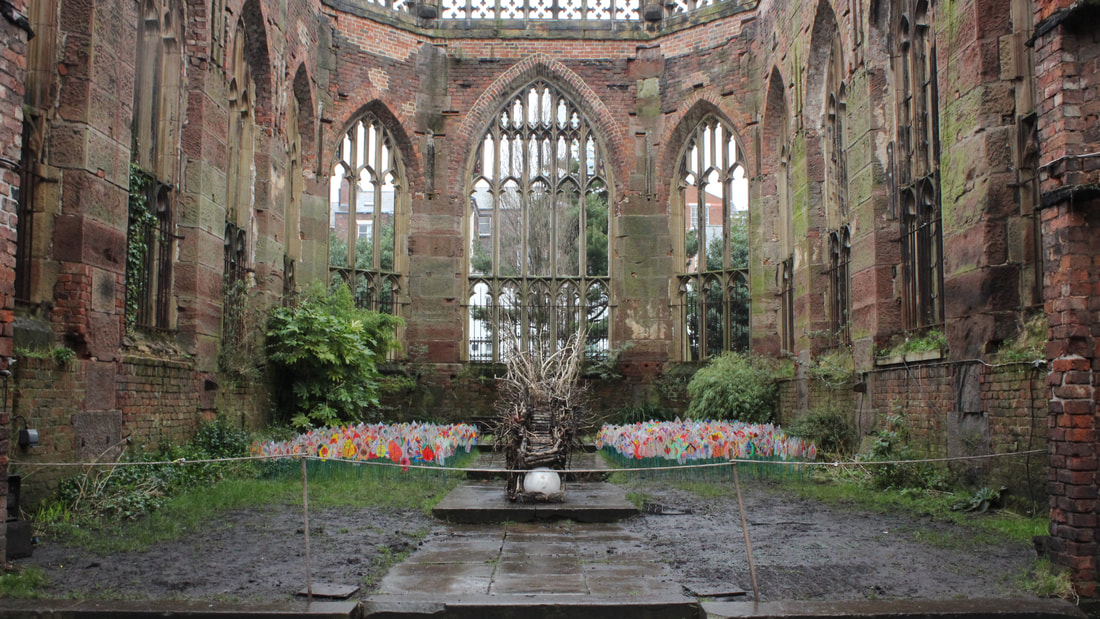
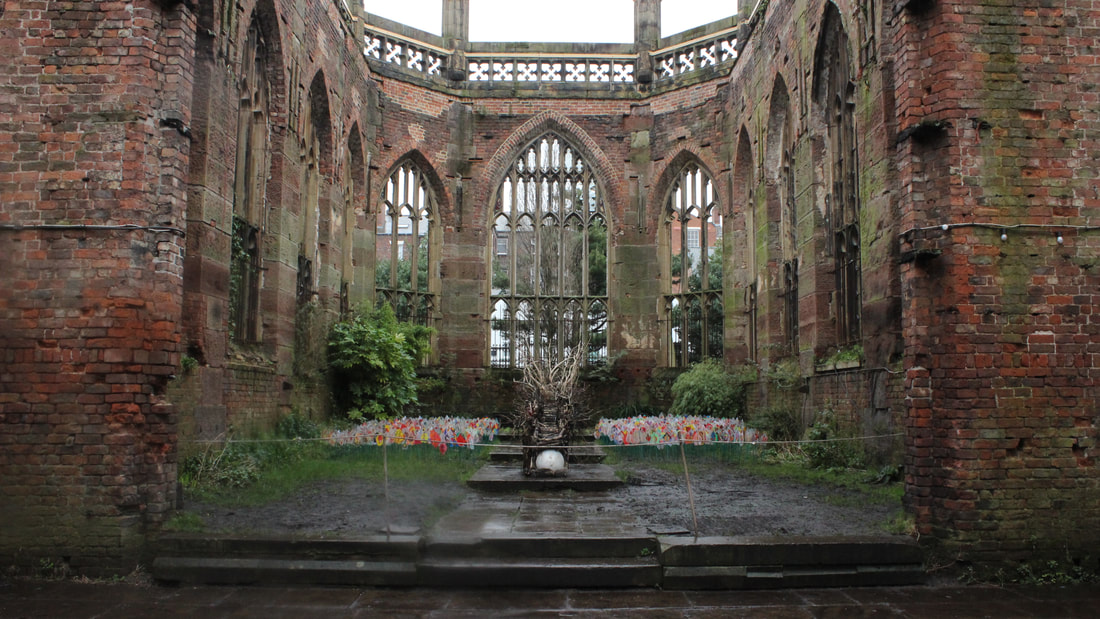
St Luke's, Bombed out church


Best |
Worst |

|
|
|
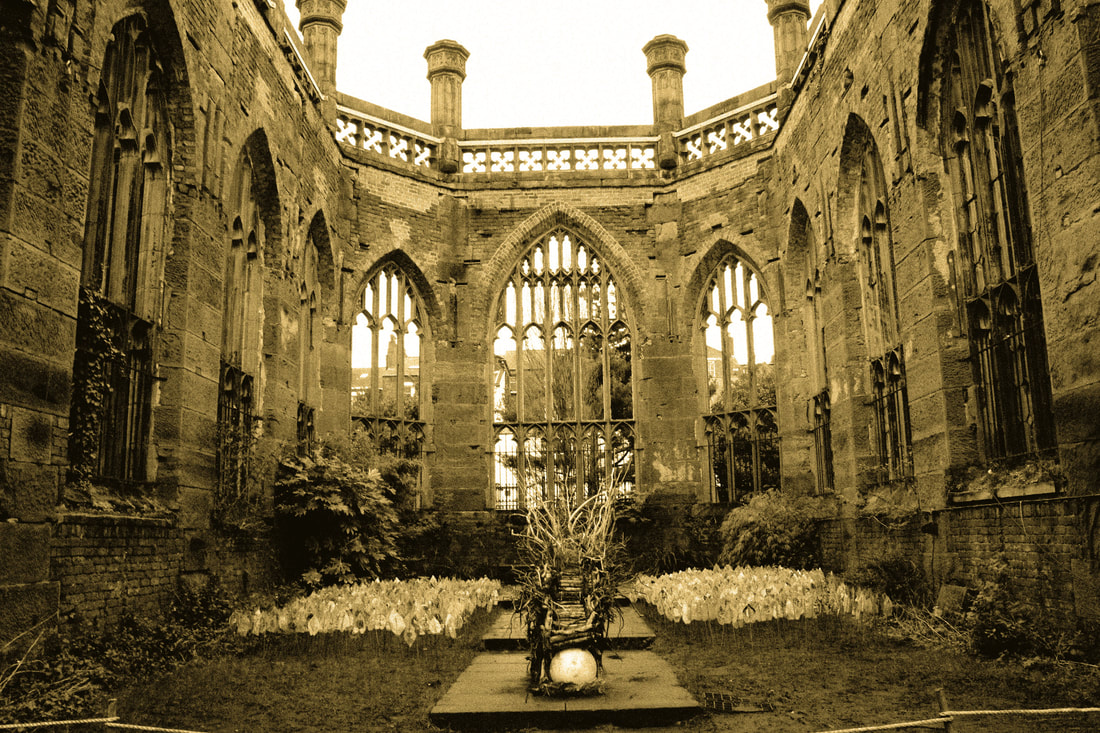
This is my best photograph form this part of the photoshoot because of the use of central focal point, asymmetry with the use of the green plant, the foreground, the middle ground and the backdrop which in this case is the greenery or the windows. Throughout the creation of this photograph I used and altered a range of camera settings to best suit the colours of the setting around the image. I also used and altered a range of camera settings to suit the amount of light being let into the camera's lens. These camera settings are, the ISO, F/stop effecting the images exposure, white balance and the shutter speed. The ISO in this photograph was set to around 400 - 800. Setting my ISO to either 400 or 800 has allowed the amount of light being let into the image to result in the photograph becoming a clear and crisp image. The F/stop in this .photograph will have been set to around F/2.8 - F/4.0. Setting the F/stop to a relatively medium setting has caused the amount of light being let into the camera's lens to effect the exposure of the image to become perfectly balanced. Setting my F/stop to around F/2.8 or F/4.0 has also allowed the photograph to have a moderately far depth of field. The white balance in this image will have been set to either 'daylight' or 'cloudy'. The white balance setting 'daylight' allows the camera to pick up the vibrance of the amount light being let into the lens, then turning the colours of the subject matter and the backdrop to become more saturated in the daylight. Setting the white balance to 'cloudy' causes the amount of light being let into the lens to make the colours of the brick walls and the flower bead on either side to become slightly colder. This really helps give the effect and impression that the photograph was taken on a darker, cloudy day. The shutter speed in this image will have set at around either 1/500 - 1/125. Setting the shutter speed to this setting has caused the the amount of light being let into the image to effect the speed at which the shutter on the camera opens and closes. The speed at which the shutter opens and closes can cause the camera to take the photograph to take the image slower, so therefore I had to use a tripod to ensure that the photograph stayed in focus.
If I were to go back and take the image again I would ensure that my lens was wiped clean as the of the middle of the top part of the image has a drop of rain. This drop of rain has caused the top of the image to become slightly distorted. |
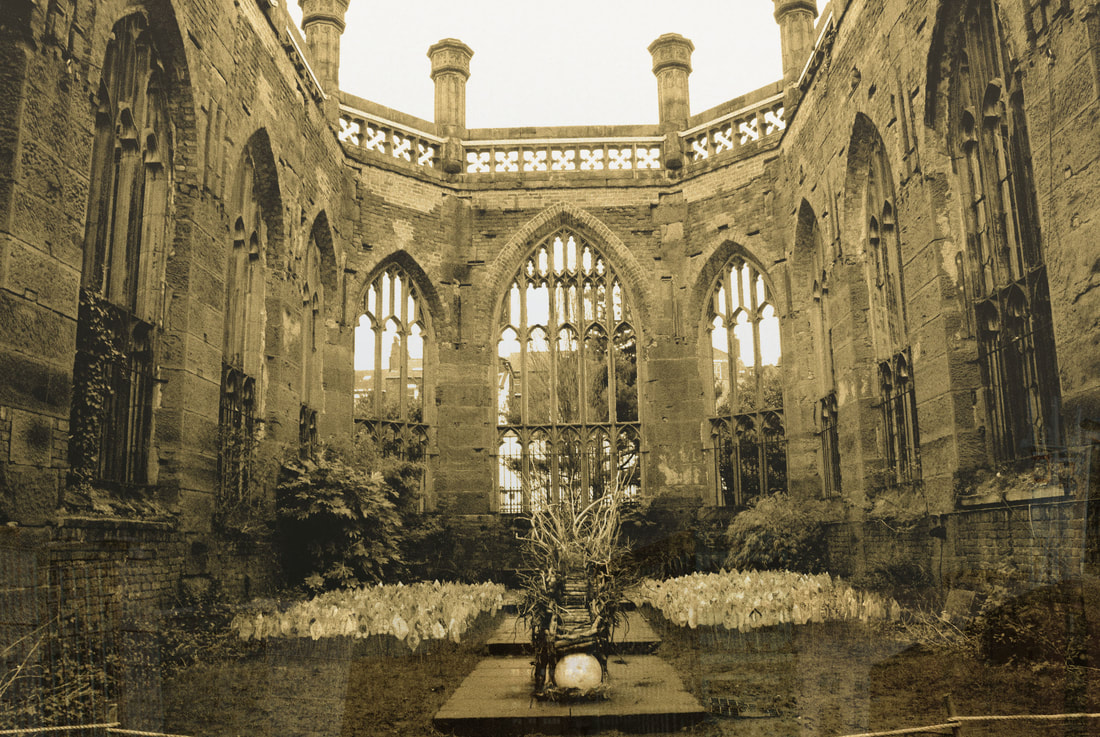
This is my worst image from this part of the photoshoot because the subject matter is slightly out of focus, the use of central focal point in this image has caused the image to become less intriguing, the photograph was taken to close to the subject matter causing the edges of the image to become too asymmetrical and the F/stop causing the exposure in this image to become slightly unbalanced. Throughout the creation of this photograph I used and altered a range of camera settings such as, The ISO, F/stop, white balance and the shutter speed. The ISO in this image will have ben set to around 800 - 1600. Setting my ISO 800 or 1600 has cameras lens to let in enough light however causing the image to become slightly noisy and grainy. The F/stop in this image will have been set to around F/2.8 - F/4.0. This has caused the top of the image where the sky is visible through the cracks of the church windows to become slightly overexposed, keeping a relatively far depth of field. The white balance in this image will have been set to either 'cloudy' or 'daylight'. Setting the white balance to 'cloudy' causes the camera to adjust to the correct amount of light being let into the lens then effecting the colours in the image. Turning them to a slightly colder tone. The shutter speed in this image will have been set to around 1/500 - 1/125. Setting the shutter speed to either 1/500 - 1/125 has caused the amount of light being let into the camera's lens to effect how quickly the shutter opens and closes. In this case the shutter has caused the photograph to become slightly out of focus. If I was to go back and take this image again I would ensure that my ISO was set to around ISO 400, causing the photograph to become better focused and make camera adjust well to the amount of light being let into lens. When taking the image again I would also ensure that my White balance setting was set to 'daylight', this will allow the photographs colours to become slightly more saturated depending on the amount light let into the lens of the camera.
|
St Luke's different angle


Top of the church


Liverpool Metropolitan Cathedral


View from the top of the stairs


Top of the cathedral


Inside the cathedral


Different angle inside the cathedral


Ceiling of the cathedral


Statue from a distance


Golden statue closer up


Places and photoshoot - Manchester city centre
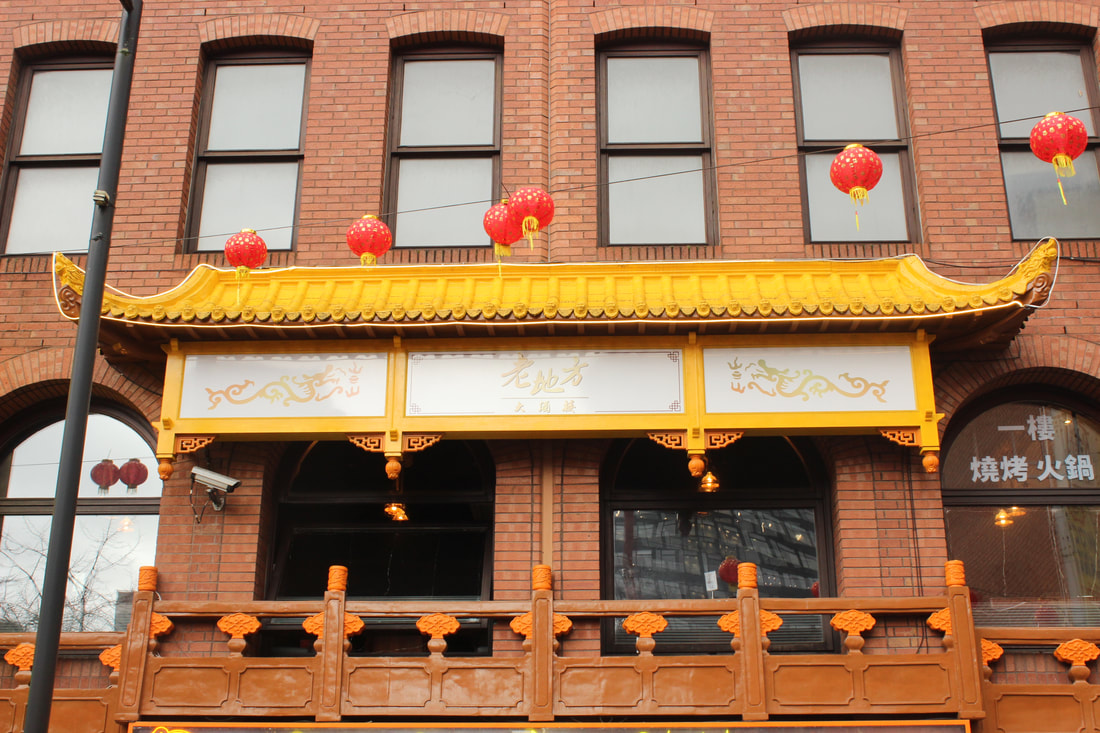
Chinese restaurant


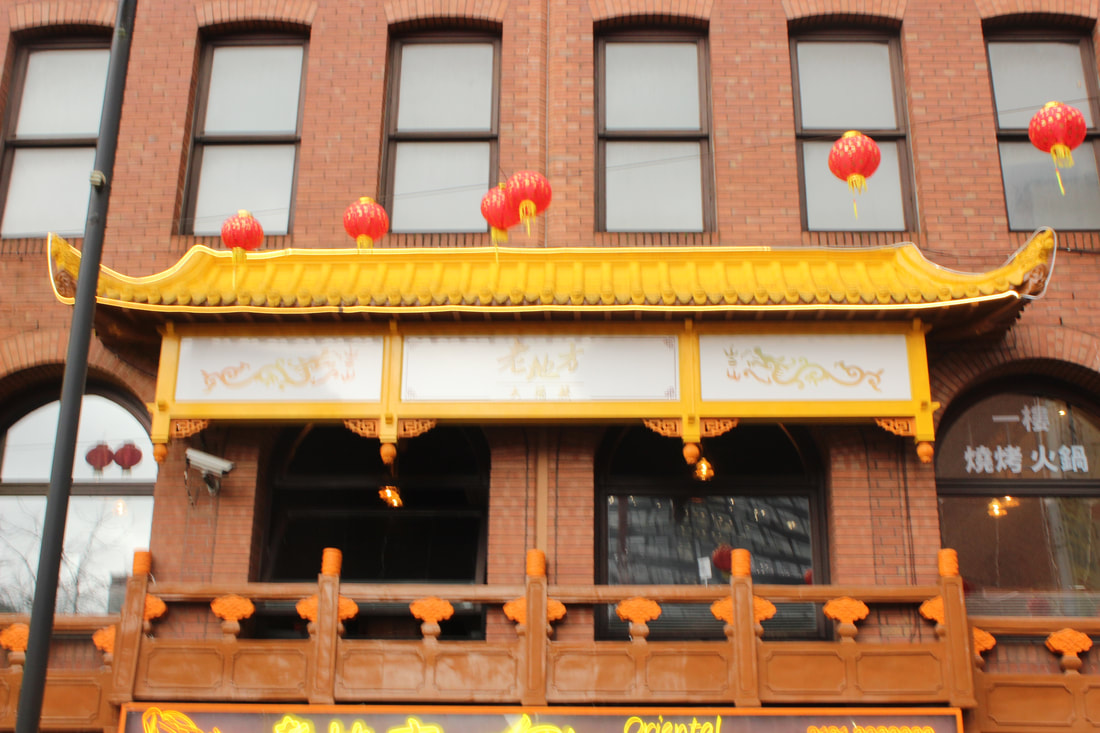
Another angle of the restaurant


Best |
Worst |
|
|
|
This photograph is my best from this part of the photoshoot as it contains strong use of central focal point, slight leading lines, its well focused and has the correct usage of the ISO setting. Throughout the duration of creating this photograph I used and altered a range of camera settings. For example, the ISO, F/stop, Shutter speed and the white balance. The ISO in this image will have been set at around 400 - 800. This allowed the cameras lens to let in enough light to the point where the image has become not too noisy, grainy and well balanced. The F/stop in this image was set to either F/4.0 or F/5.6. This will have caused the photograph to have become well exposed and balanced while keeping a relatively far depth of field. When creating this photograph the shutter speed will have been set to either 1/250 or 1/125. The shutter speed was changed to this setting as the area and vicinity around the photograph didn't have much natural light being let into the cameras lens so therefore the shutter had to open slower for it to capture the light coming from the front of the restaurant and the small quantity of sunlight. The white balance in this image will have been set to either 'Auto' or 'Cloudy'. Setting the white balance to auto allows the camera to adjust to the amount of light being let into the lens from the composition of the photograph, it then will choose a white balance setting appropriate for the amount of light in the lens. Setting the white balance to cloudy causes the colours in the image to become cooler giving the image a more dull or sombre sensation. If I was to go back and take this image again I would ensure that I set the ISO to 400. This will have allowed the camera to let in enough light to the lens where it stays a clear and crisp image but the white sign above the windows become more in focus.
|
This photograph is my worst from this part of the photoshoot. This is because it is out of focus, Quite grainy and what I altered the camera settings to were far pretty far from what they needed tot be set at. The use of the ISO in this image being set at around 800 has caused the camera to let in too much light to the point where the photograph has become noisy and grainy. The F/stop in this photograph will have been set to around F/2.8. Setting the F/stop to this setting has caused the image to become slightly over exposed with a closer depth of field. The shutter speed in this image was set to a slow setting at around 1/125 - 1/60, causing the photograph to become very out of focus as I was unable to keep the camera still for the time duration that the shutter opened and closed. The white balance in this photograph will have been set to either 'auto' or 'daylight'. Setting the white balance to 'auto' will have allowed the camera to automatically choose a white balance that is appropriate or suitable to the amount of light being let into the lens due to the composition of the photograph. Setting the white balance to 'daylight' however, causes the brighter colours in the photograph to contrast well with a sunny sky and to be highlighted more.
If I was to go back and take this photograph again I would ensure that I set my ISO to around 400 which would result in a much clearer and crisp image. I would also ensure that I use a tripod to allow the camera to stay completely still when the its shutter speed is set to a lower setting. In this case using a tripod would have caused the photograph to become much more in focus. |
Third angle of the restaurant


Fourth angle of the restaurant


Looking down a street


Street from a lower angle


China town archway


Lower angles of the archway


The archway from a slight distance


Archway from a further distance


Down an alley in China town


Corner of a street in China town


King street


Down king street from a second angle


King street from a third angle


Building on kings street


Pedestrianised area of kings street


Pedestrianised King street second angle


Passage to St Anne's square


Kings street from a distance


New cathedral street


New cathedral street second angle


Stream by the football museum


Up a stream


Bottom of the stream


By the entrance to the Victoria train station


First view on the top level


High angle of the ticket office


down the path to the MEN arena


Dome on top of the Cafe


Corner view of the café


Top view of the tracks


Tram rolling into the station


Train rolling in


Another top view of the station


High view of the rails


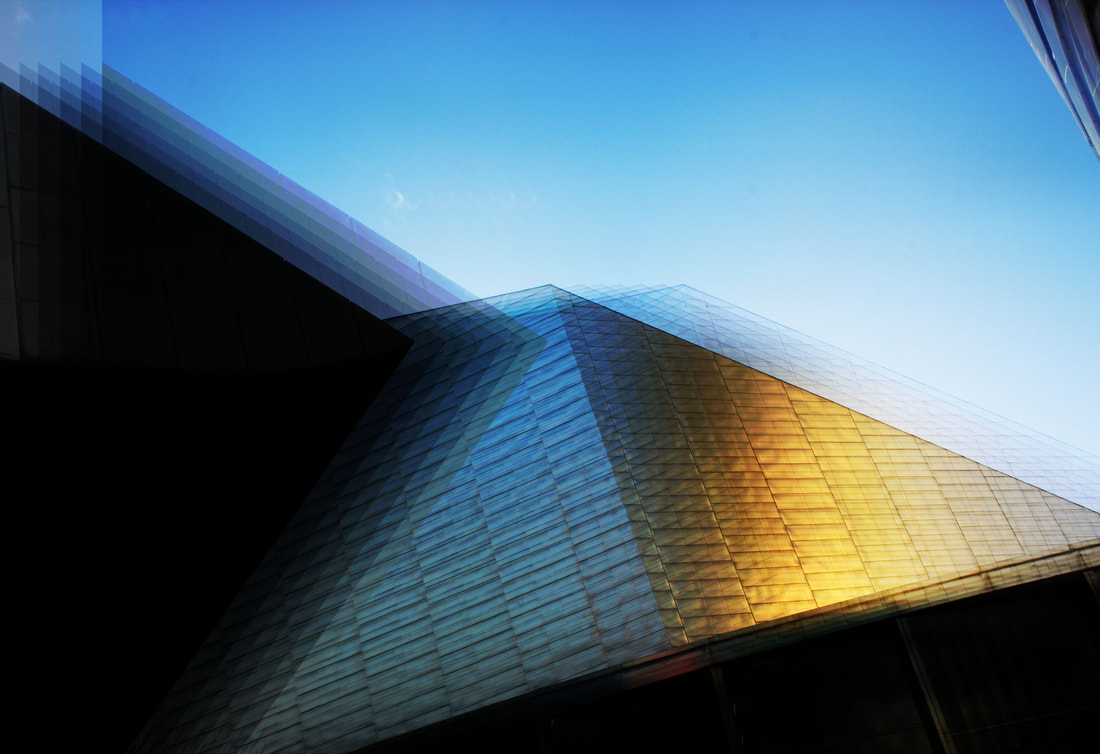
Skyline edit 1 - saturated outcome
Before |
After |

|

|
Edit snips


Panoramic skyline edit 1
Before

After

Edit snips


Desaturated variant - panoramic skyline edit
Before |
After |
|

|
Edit snips


Vintage effect edit 1
Before |
After |
|

|
Edit snips


Work Completed In Ten Hours
Session 1
Before |
After |

|
|
Edit snips


Edit 2
Before |
After |

|
|
Edit Snips


Edit 3
Before |
After |
|
|
Edit snips


Session 2 - Different colour ways
Edit 1
Before |
After |

|

|
Edit Snips


Desaturated variant of edit 1
Before |
After |

|
|
Edit snips


Edit 2
Before |
After |

|

|
Edit snips


Desaturated variant
Before |
After |
|
|
Edit snips


Session 3
Vintage edit
Before |
After |

|
|
Edit snips


Decrease in opacity 1
Before |
After |
|
|

|
Edit snips


Opacity decrease for edit 1
90% decrease in opacity
|
|

|
Edit Snips


60% decrease in opacity
Before |
After |
|
|
|
Edit snips


40% decrease in opacity
Before |
After |
|
|
|
Edit snips


20% decrease in opacity
Before |
After |
|
|
|
Edit snips


10% decrease in opacity
Before |
After |
|
|
|
Edit snips


Vintage Edit 2
Before |
After |

|
|
Edit snips


90% decrease in opacity
Before |
After |
|
|
|

80% decrease in opacity
Before
|
After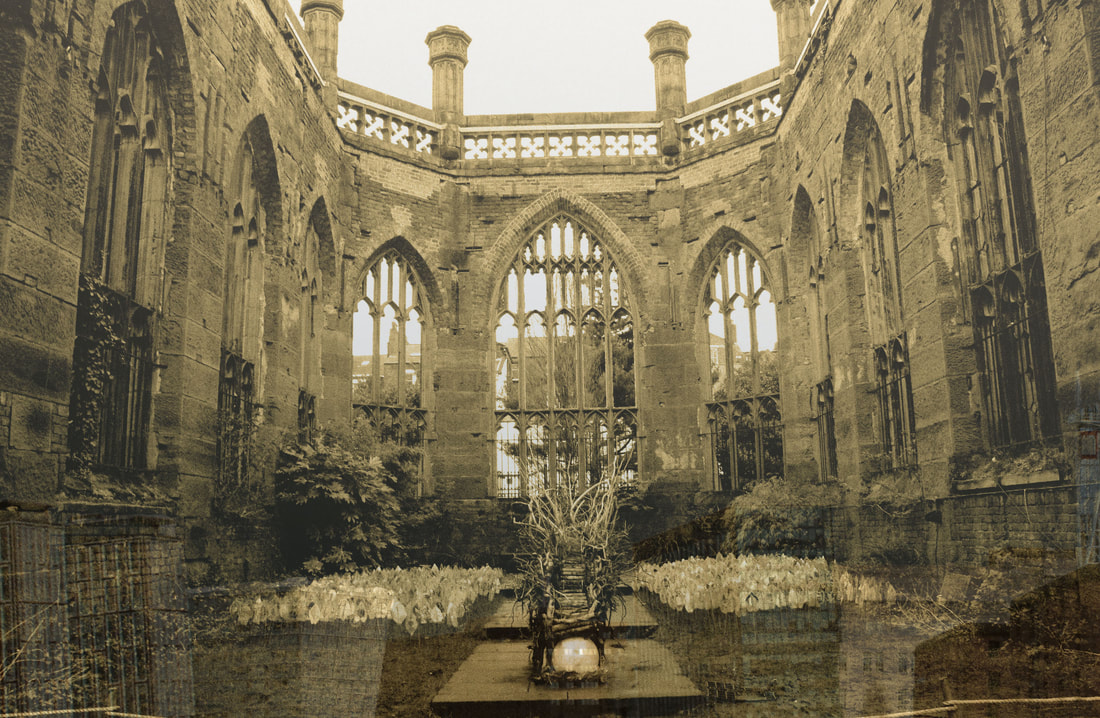
|
Edit snips


60% opacity variant
Before |
After |
|
|
|
Edit snips


40% opacity variant
Before |
After |
|
|

|
Edit snips


20% opacity variant
Before |
After |
|
|
|
Edit snips


10% opacity variant
Before |
After |
|
|
|
Edit snips


Vintage edit 3
Before |
After |
|
|
Edit snips


90% opacity variant
Before |
After |
|
|
|
Edit snips


80% opacity variant
Before |
After |
|
|
|
Edit snips


50% opacity variant
Before |
After |
|
|
|
Edit snips


Final Gallery
Skyline Edits


Vintage edits
Opacity decrease outcomes
First batch

|
|
|
|
|
Second batch
|
|
|

|
|
|
|

|
Third batch
|
|
|
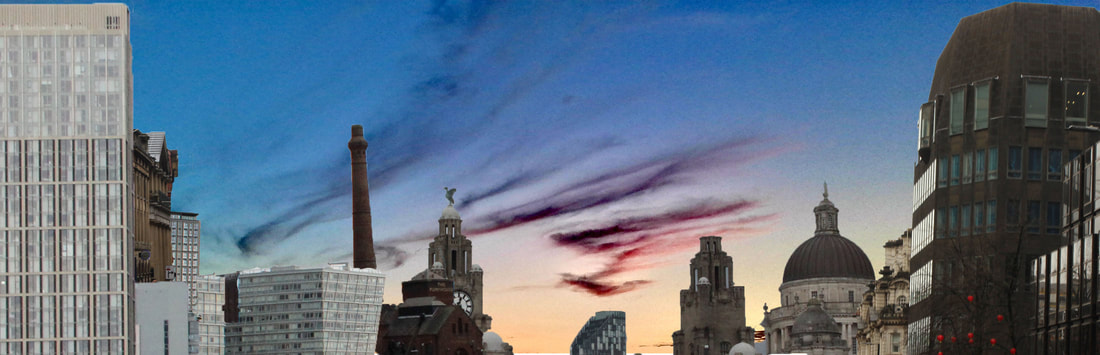
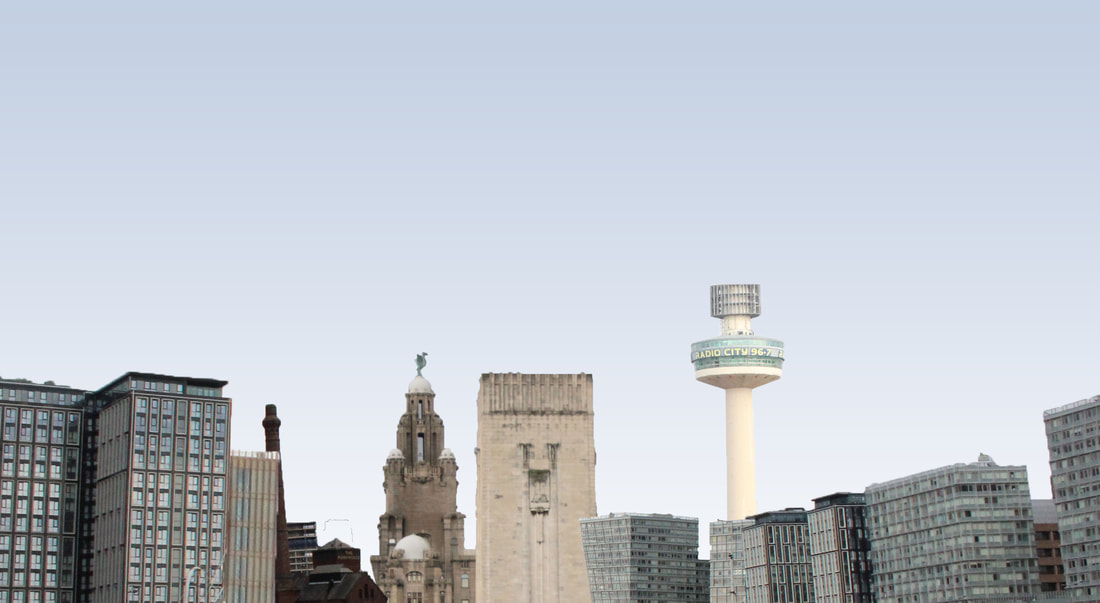
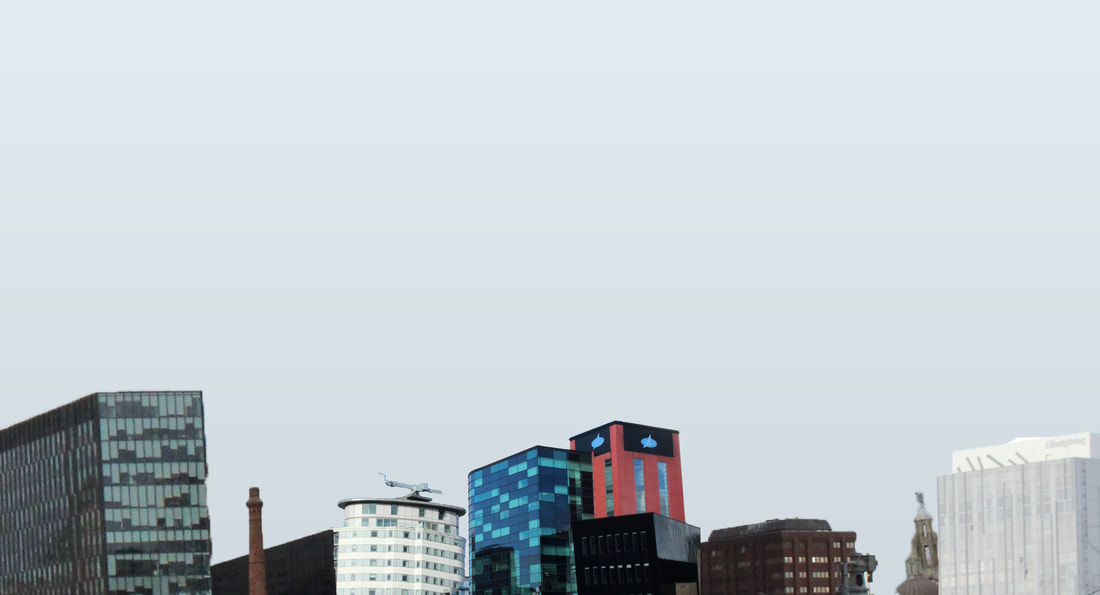
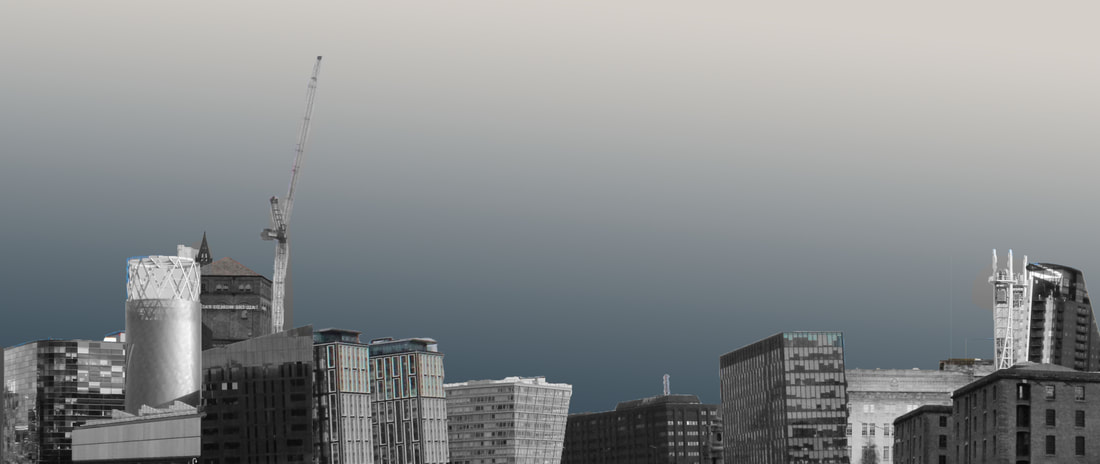
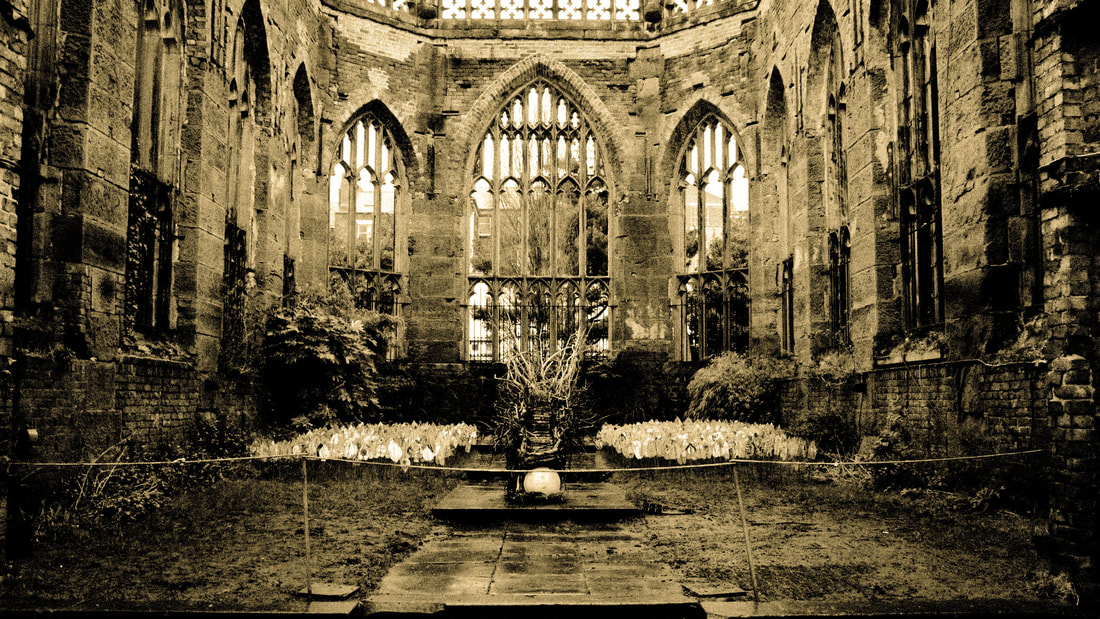
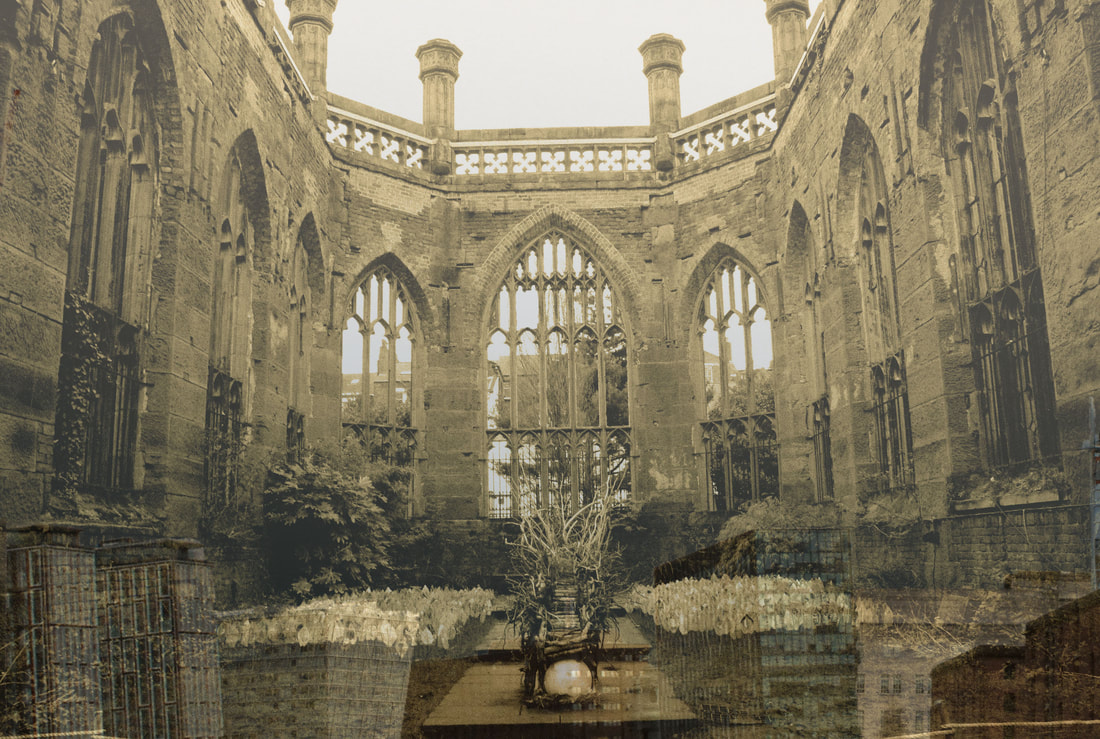
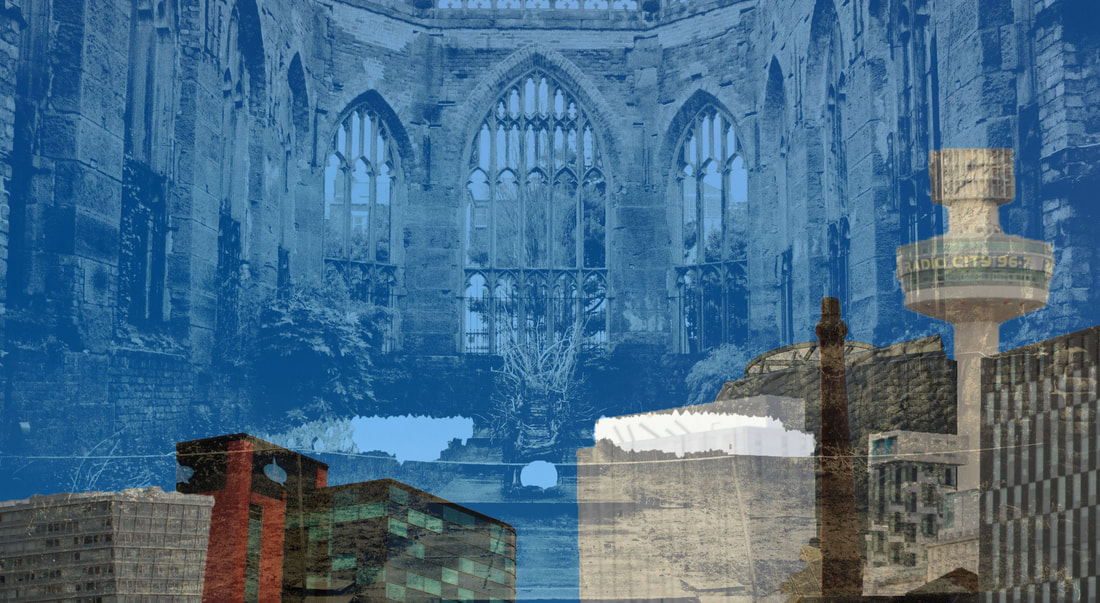
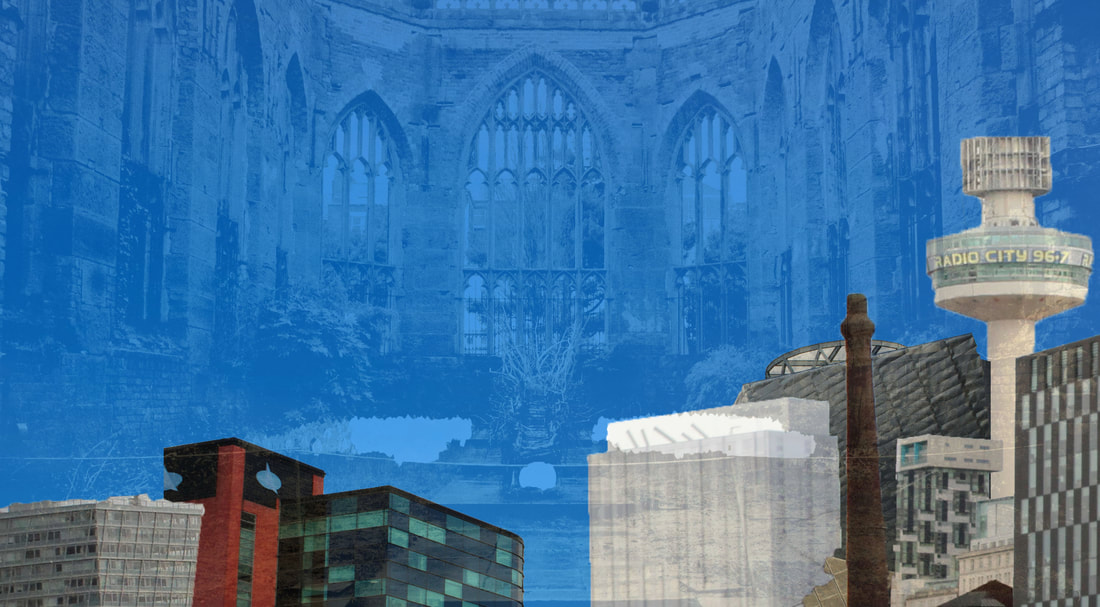
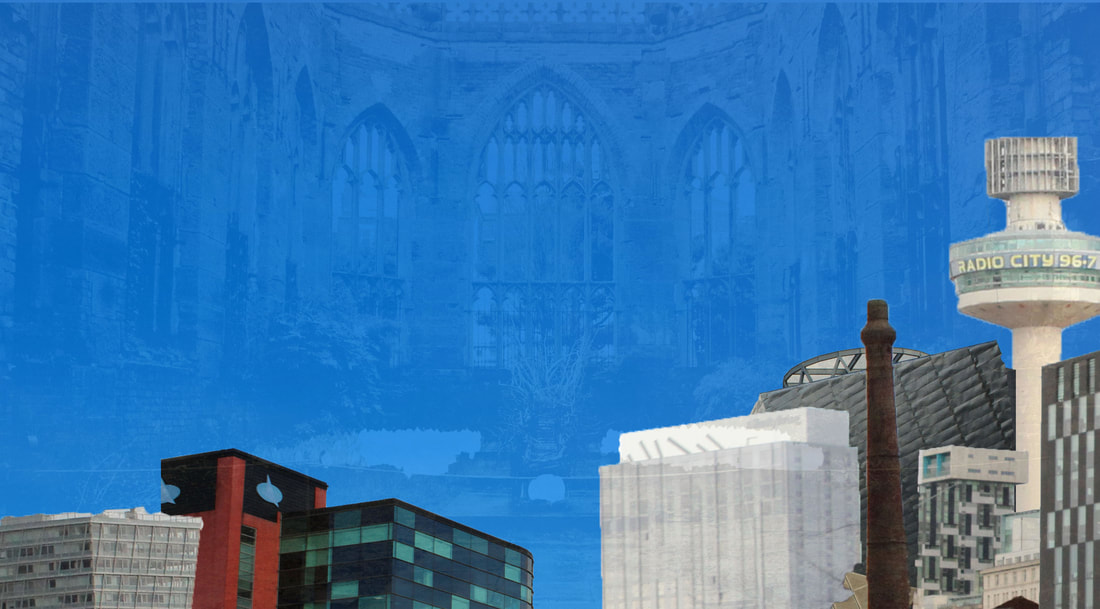
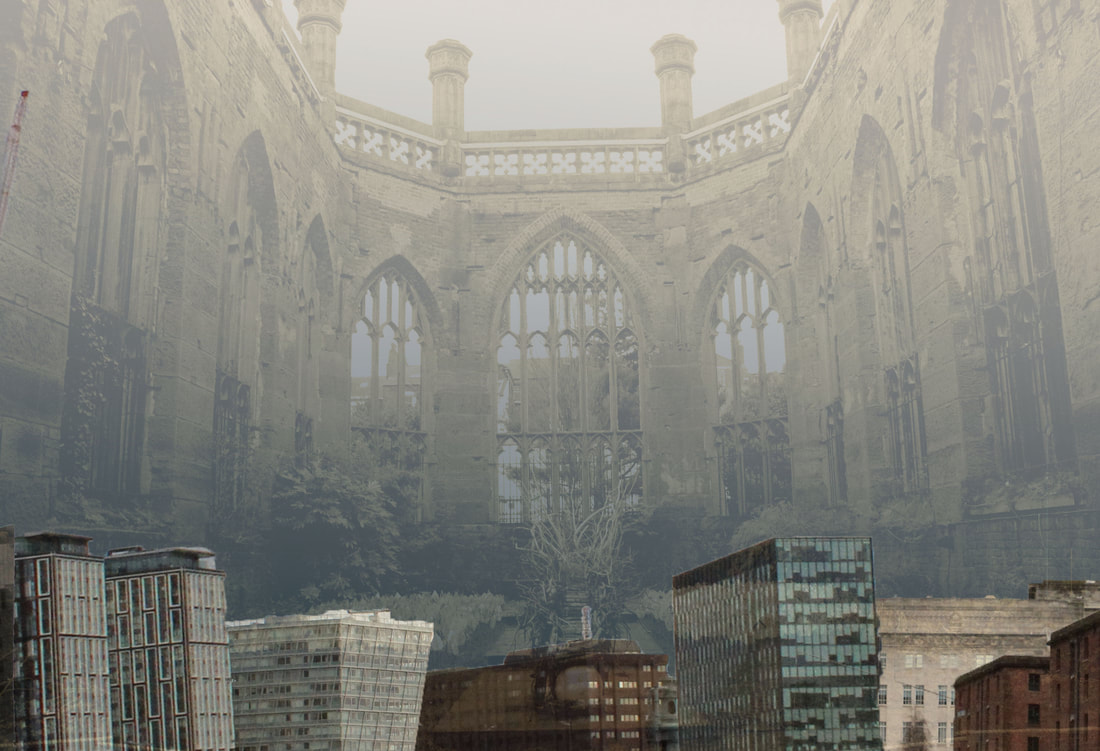
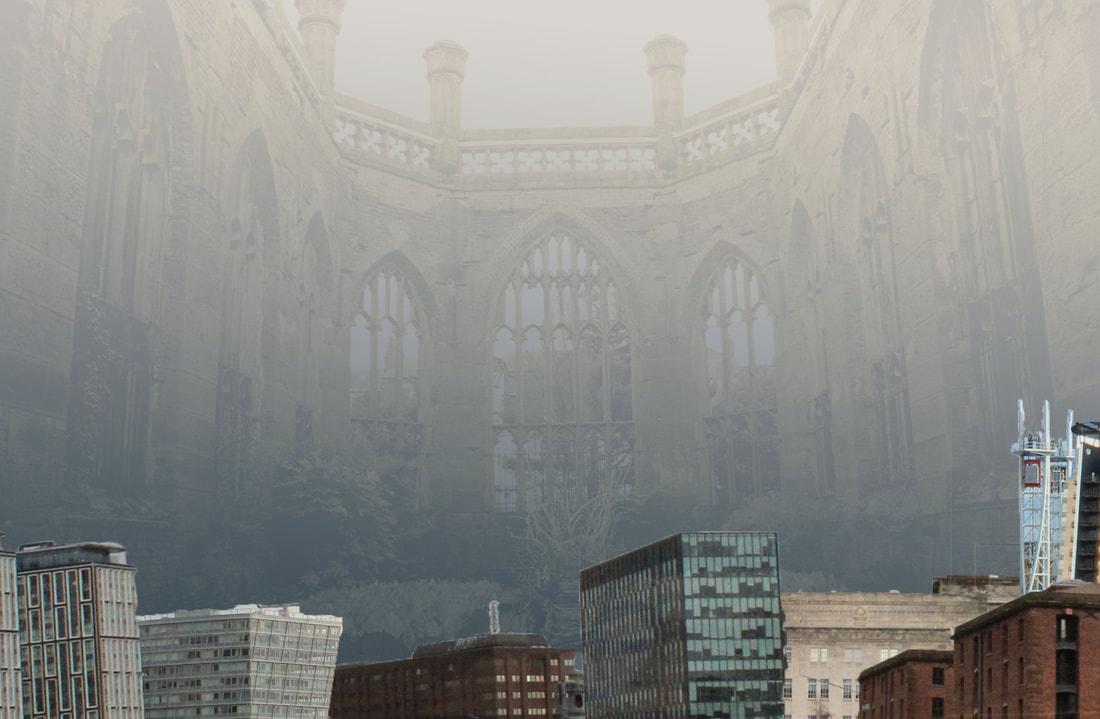
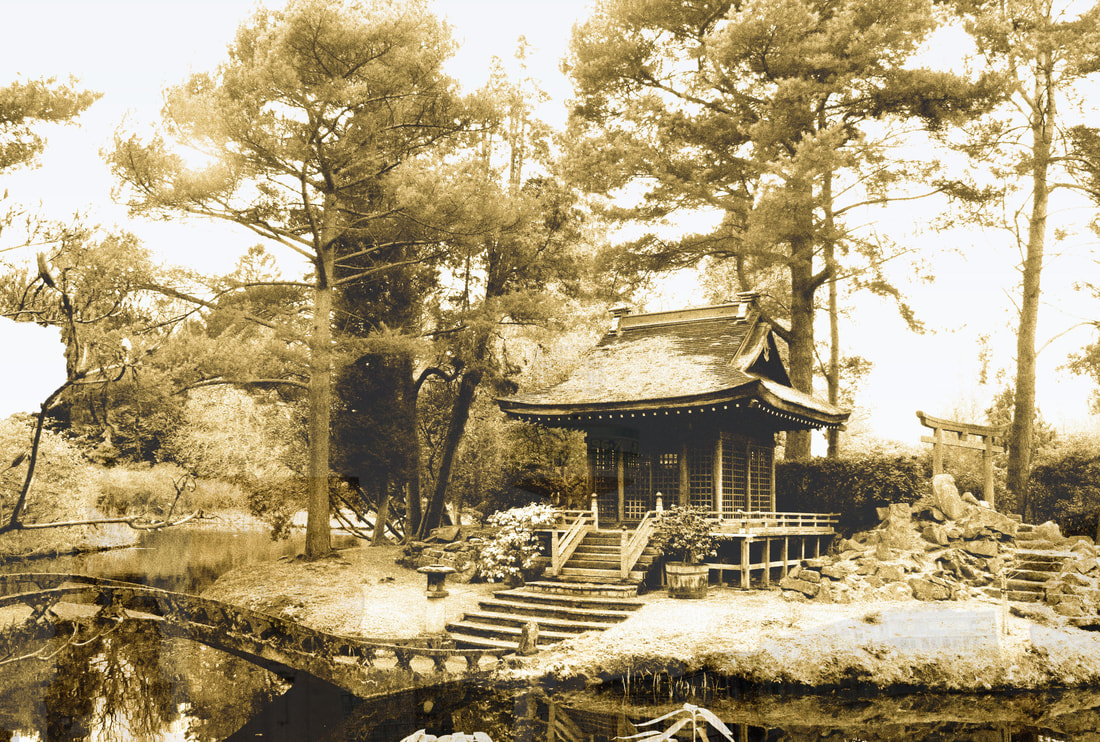
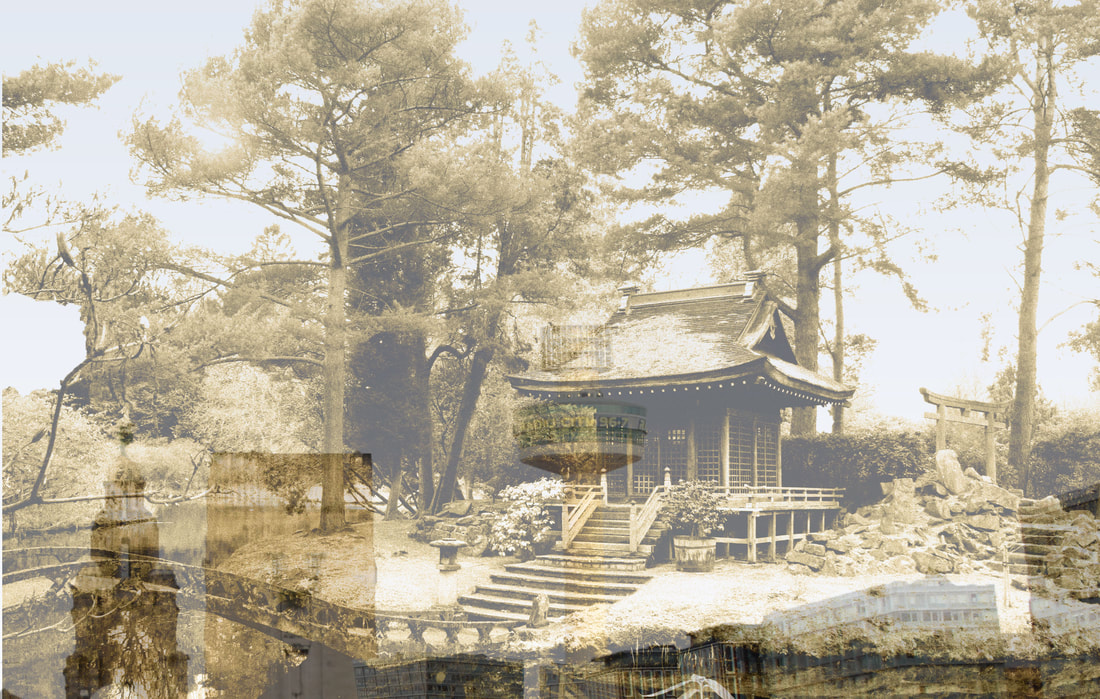
Project Evaluation
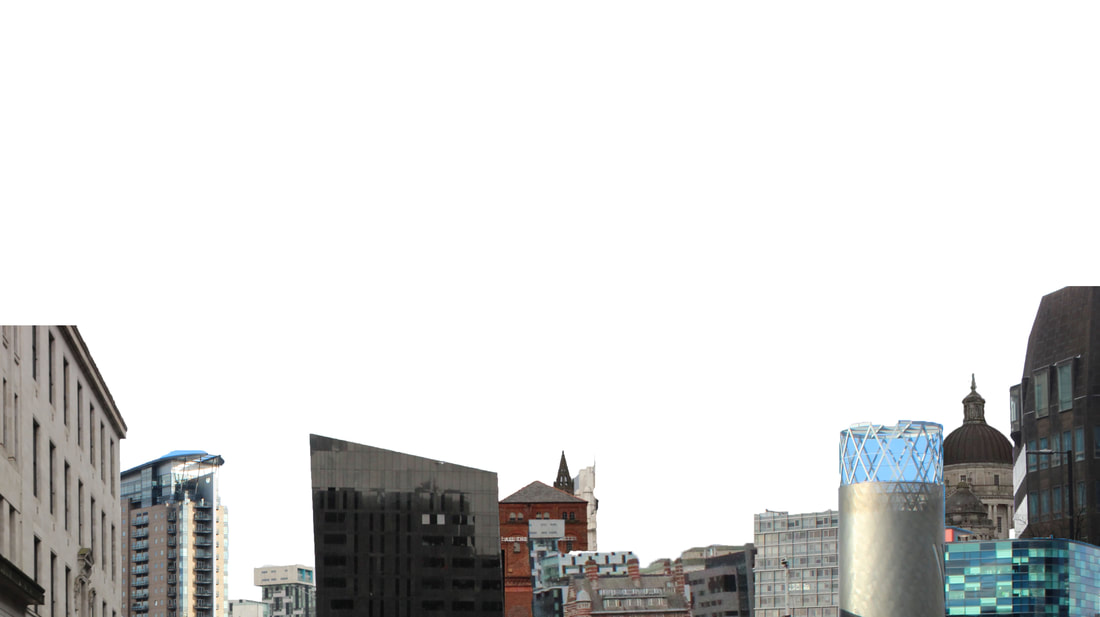
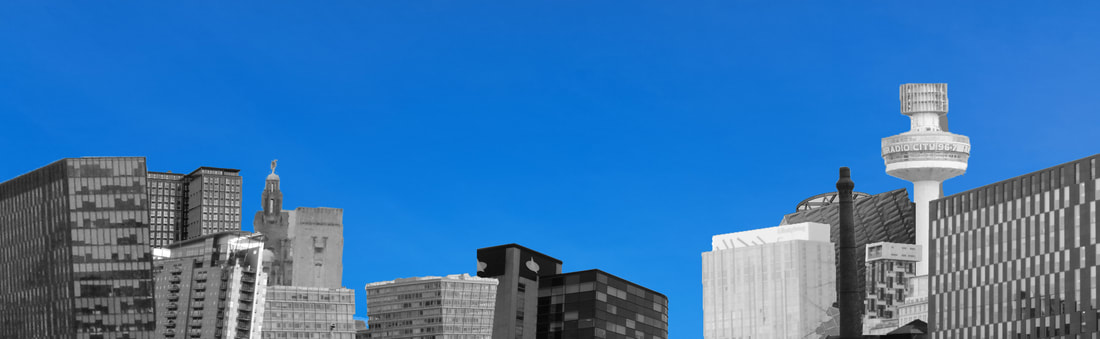
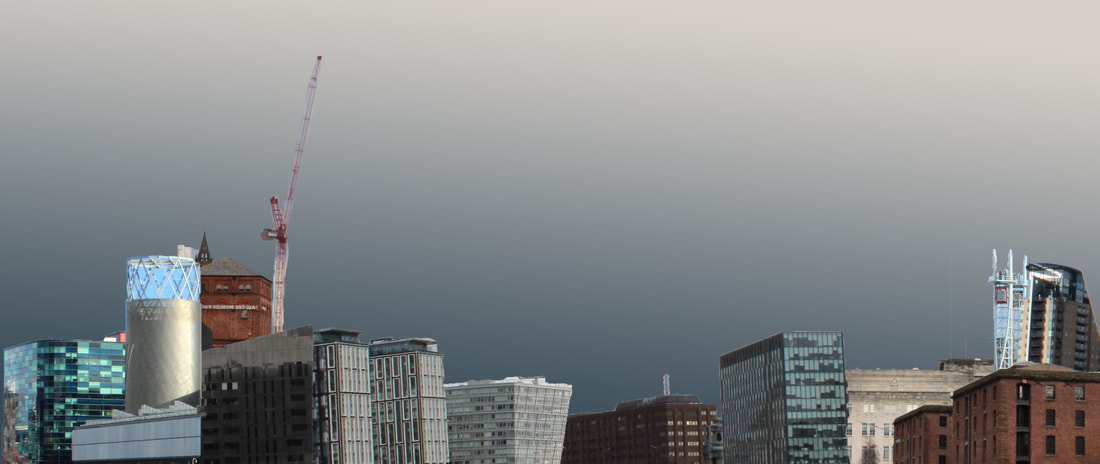
Within this project of places and spaces I have explored a range of types of styles of architecture and landscape photography, A range of ways to carry out these styles photoshoots (either spontaneous or planned). When we first stared the project theme of places and spaces I felt fairly confident about it. This was because that I realized that similar to portrait and framing, there are so many different styles and ways of completing/carrying out your photographs and photoshoots as there are so many different ways to gather marks. As my work developed over time I feel as if I gained a whole range of skills, not just compositionally and technically with camera settings but more creative initial ideas before I go ahead and complete a photoshoot. During this project of Places and spaces I have explored a range of photographers such as Thom Wayne, Stephanie Jung, Candida Hofer and Ansel Adams. All of these photographers display a wide range styles of landscape/cityscape photography and edits. These styles have influenced me through my edits in a number of ways. For example, the innovative and meaningful photographs of candida Hofer have allowed me to create far more purposeful edits. This would include my vintage edit of St Luke's bombed out church in Liverpool which is shown in the Liverpool photoshoot, that gradually decreases in opacity the further you scroll down on that part of my website, revealing a more modern building behind it. This was done to show the contrast and extreme difference between more modern architecture and cityscapes with older 19th century architecture. When analysing Candida Hofer's eye opening photographs, it really changed the way I thought when taking my own photographs as she gives a deeper purpose and meaning into every single photograph she has taken which has inspired me to try and do so too.
Throughout this project I have explored a range of compositional rules when taking my photographs such as, central focal point, strong leading lines, the rule of thirds, asymmetry and symmetry. Implementing these compositional rules into my photographs provided me with a wide range of opportunity in my editing along with the quantity of photographs I had taken in each photoshoot being a factor to the edits I could complete. For the duration of this project I have Explored, analysed in great depth and implemented inspiration into my own work from a wide variety of photographers I chose to research. during this project I ensured that I carried out many different types of edits that I had never completed before in a previous project to make my edits as unique as possible.
This project of places and spaces has taught me to become far more patient when carrying out a photoshoot as it wont always go to plan instantly, there will be moments where a certain angle or camera setting isn't quite right which is affecting the whole photograph however, when carrying out photoshoots in this project despite the drawbacks of the camera settings not being quite right when taking some of the photographs I stayed patient and thought rationally to fix the issue. From looking at this project I hope for viewers to understand the sheer amount of time, dedication and effort that was put into the development of this project.
